AMO CALIBRATION
1. Download application
- Download the application form the vendor website or from our storage (\iiticubstor01.iit.local\common\drivers_and_software\iC-Haus\MU_9SO_gui_B2rte.zip)
Warning
The application must be version B2
- Install the application.
2. Hardware Connections
- Connect the cable of the adapter
MB3U-SPIto the USB and to the sensor.

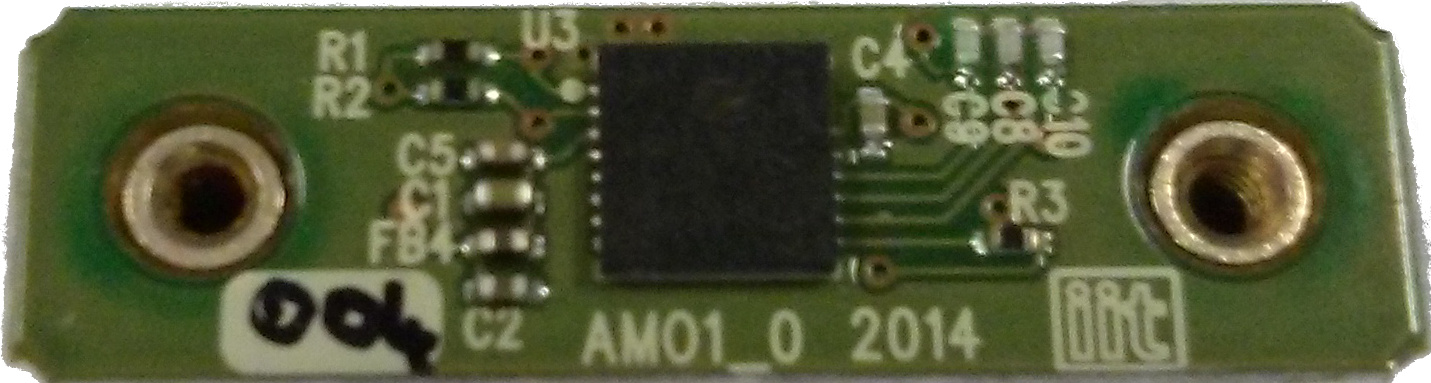
The AMO board
This should be done before executing the application.
3. Procedure
- Execute the application
- Click on
Disconnected
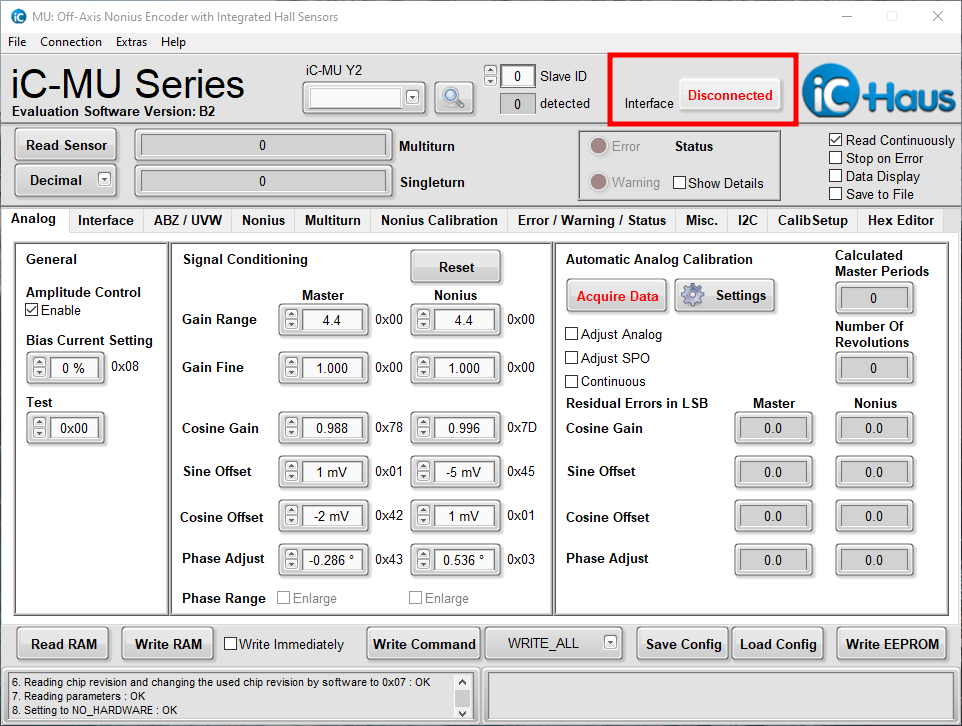
- You should get the button coming green and the text changes to
Connected - Click on
Load Config
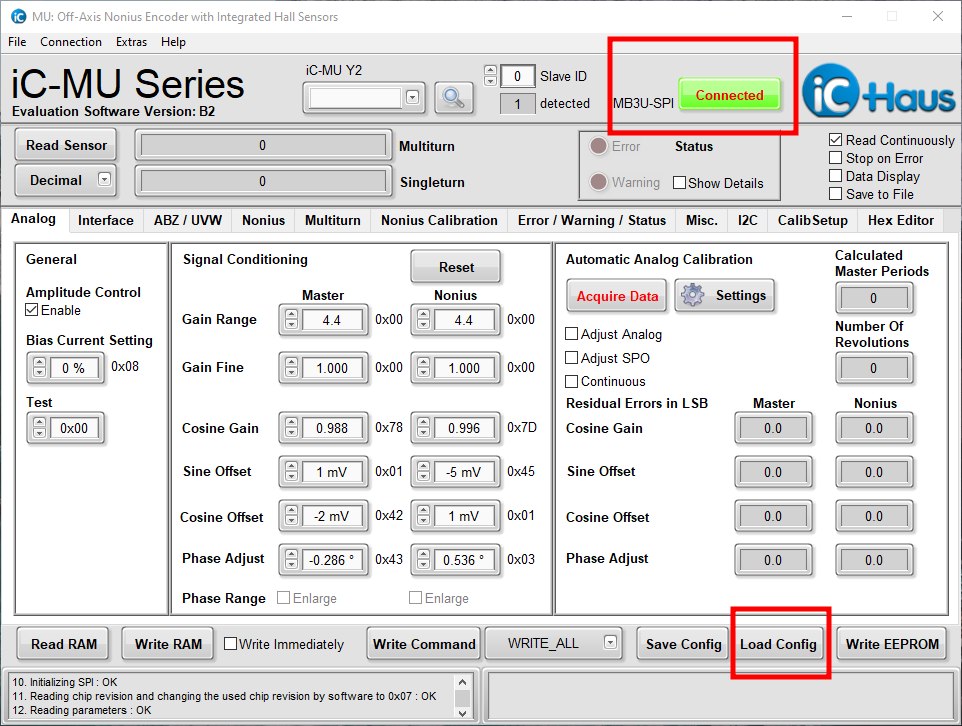
-
Select the appropriate
.conffile according to the number of poles of the magnetic ring- 32 poles -> B2_ConfigurationAMO_32
- 64 poles -> B2_ConfigurationAMO_64
-
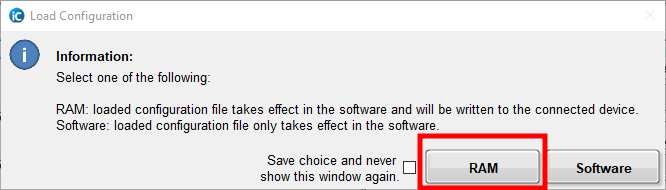
In the MessageBox click on
RAM
- Go to the "Nonius Calibration tab, check both
Adjust AnalogandAdjust SPOcheckboxes and click onAcquire Data, then move the joint by hand
Note
The joint movement should be slow and constant. The movement should cover all the joint range.
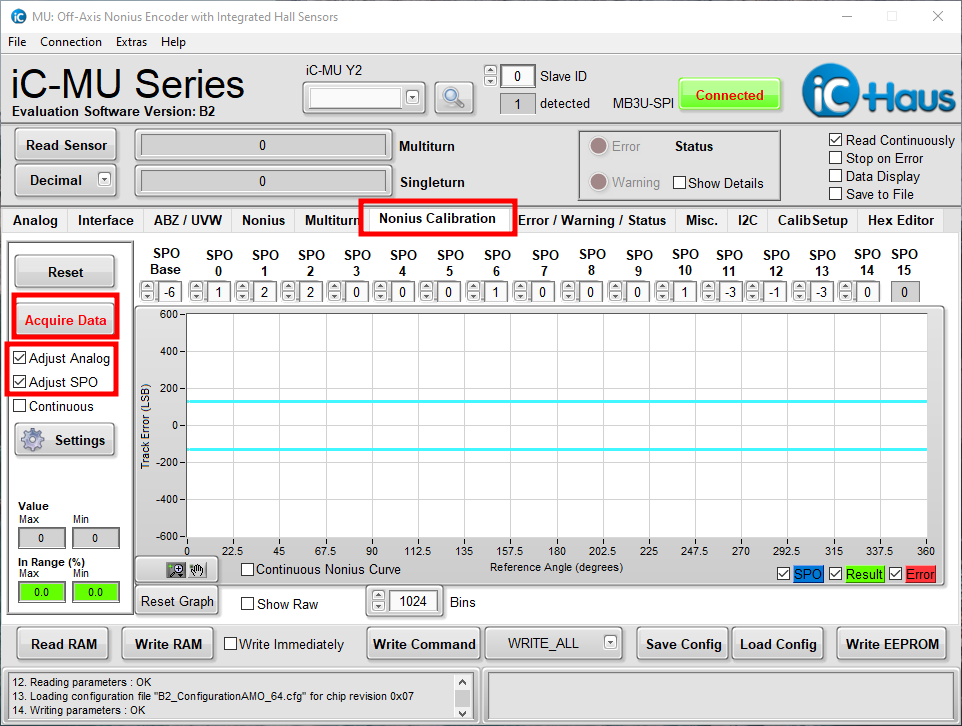
- The result in the graph should be similar to the following

If the graph is OK then :
- Click on
Write RAM - Click on
Write EEPROM
Troubleshooting
Here you can find the most common issues when dealing with AMO calibration and how to fix them.
Magnetic ring or AMO board incorrectly mounted
During the Nonius calibration procedure it can happen to get such a result:
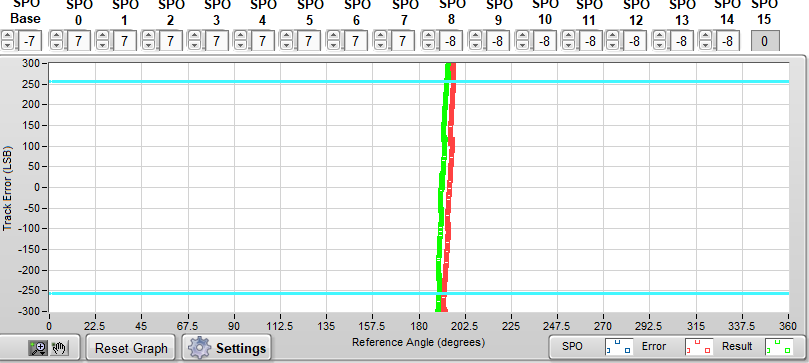
This means that either the magnetic ring or the AMO board are flipped by 180 degrees with respect to their correct orientation, and need to be rotated to fix the problem.
Warning
Always check the correspondance with the CAD placememnt