FINGERS HALL/MAGNET CALIBRATION
1 Document Scope
Info
This procedure shows how to tune the magnet/hall sensor position on the fingers
2 Requirements
2.1 Hardware Requirements
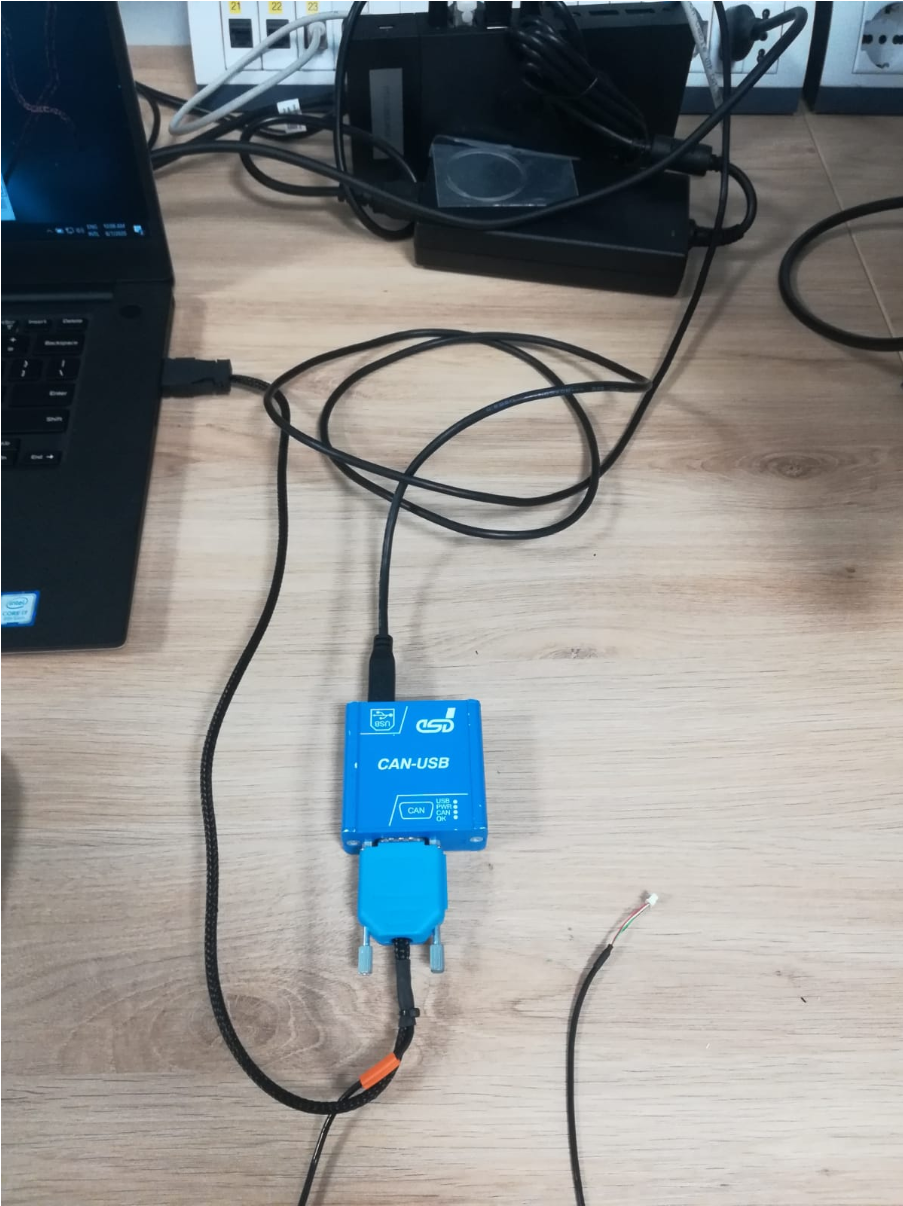
- ESD USB-CAN with usb power supply cable. [cod.IIT 1014]
2.2 Software Requirements
- PC with
Windows 10andUbuntu 20.04 LTS(the robotology-superbuild must be installed on theUbuntumachine/partition) - GULP software tool [© Istituro Italiano di Tecnologia]
- ESD CAN-USB SDK and drivers [© esd electronics gmbh]
3 Software install
3.1 Install GULP
On the Windows 10 machine:
- Download the above linked
GULParchive and extract it - Install
Win10Pcap-v10.2-5002,exe - Install
InstallGulp.exe
Info
When asked to install WinCap select NO since it has alredy installed with the correct version for Windows 10 in the previous step
3.2 Install ESD CAN-USB SDK
On the Windows 10 machine:
- Download the above linked
ESD CAN-USB SDK and driversarchive and extract it - Install
CAN_SDK.exeinside theCAN_SDKfolder
Info
The drivers for the ESD CAN-USB device are already installed by the GULP installer, anyway if you get problem when attaching the ESD CAN-USB device you can manually update the drivers pointing to the just extracted archive
4 Procedure
4.1 Flash the frimware and assignd the ID
On the Ubuntu machine/partition
- attach the USB/CAN model 2066 to pc
- attach the DB9 to USB/CAN
- attach the molex 4 pins connector to the MAIS board on the hand to be tested
- In a shell type
sudo ip link set can0 type can bitrate 1000000
sudo ip link set up can0
this allows you to communicate with the CAN device.
-
Now launch:
FirmwareUpdater -a -
select
SOCKET_CANand thenDiscover - Download this folder containing necessary files and extract it
- select
Upload Applicationand selectAdcMAIS.hexfrom the just extracted folder - select
Cahnge CAN addresschange CAN ADDRESS to5
4.2 Regulate the magnet position and check hall sensor readings
On the Windows 10 machine/partition
- launch the app CANreal
- Select the following parameters:
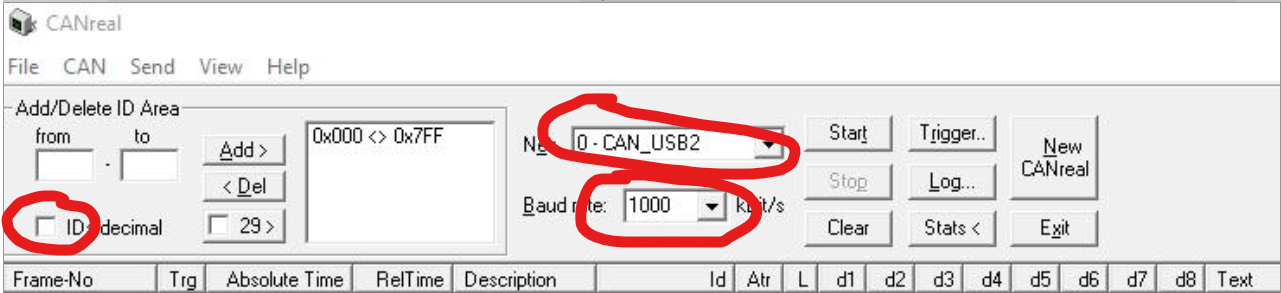
- Click on “Start”
- On the bottom, make sure that the parameters correspond to these in the picture:

- Click on “Send”
At this point the software starts to print data and you can leave it in the background.
- Now launch the software
GULP - Select
File -> load parametersand browse thefingers-hall-sensors-calibfolder already extracted
You'll find files named as thumb.xgulp, index.xgulp and so on. Select one file at the time.
- Click on
start - Open
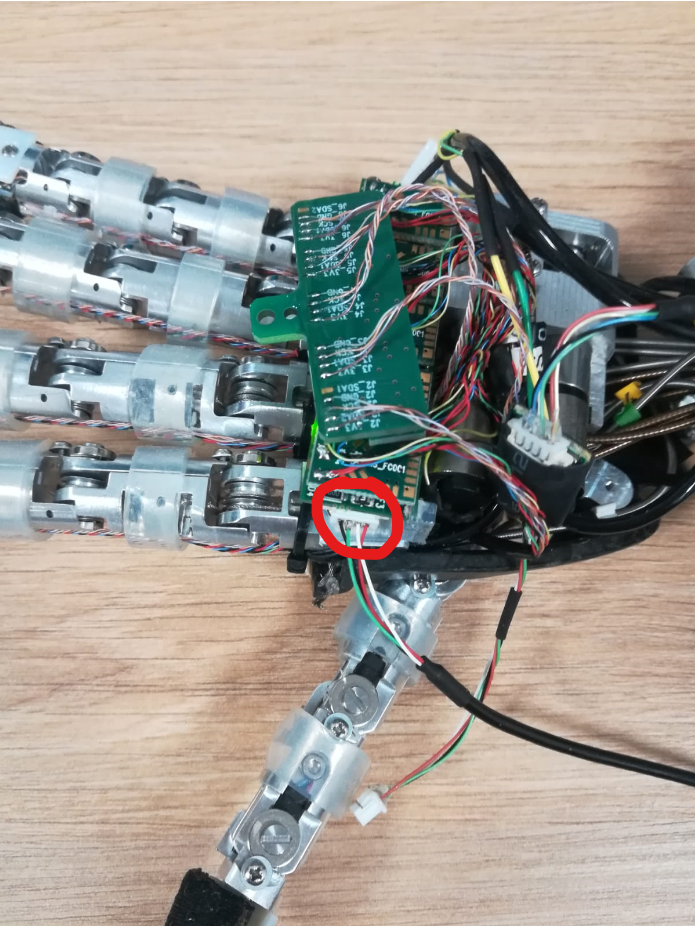
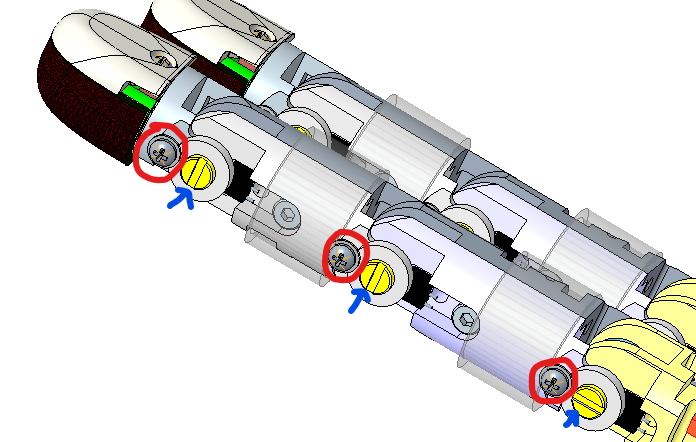
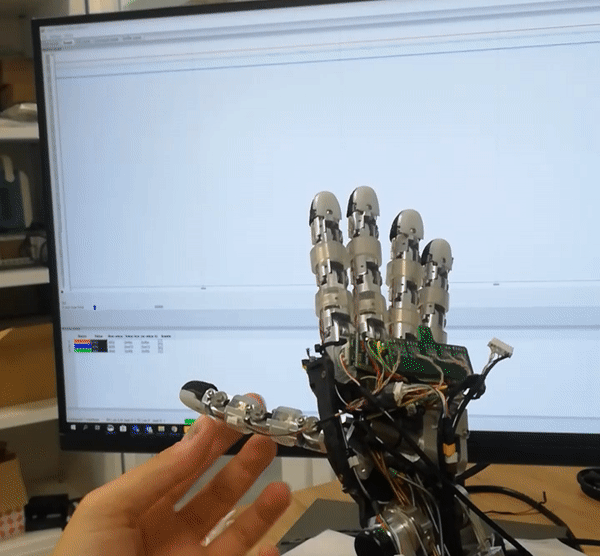
Graph - For each magnet you are testing, first loose its screw M1.6x3 holding it in place (red circle); the magnet should now be free to rotate. If it does not happen, you can loose a bit also its slotted screw (pointed by the blue arrow).
- Now start moving each magnet in order to have the lines on the top level of the graph when the phalanx is open (resting position) and on the bottom level when the phalanx is completely closed. In other words, you need to fit all the finger range of movement in the sensor range in order to have a proper reading.
Note
Once done the test for each finger, please revert the firmware of the MAIS board to the latest version released onto the icub-firmware-build repository and change the CAN ID back to 14.