Configure IP on a setup for ETH boards
This documentation describes how to setup a laptop/workstation network interface in order to communicate with an ETH board (i.e. mc4plus, mc2plus or ems)
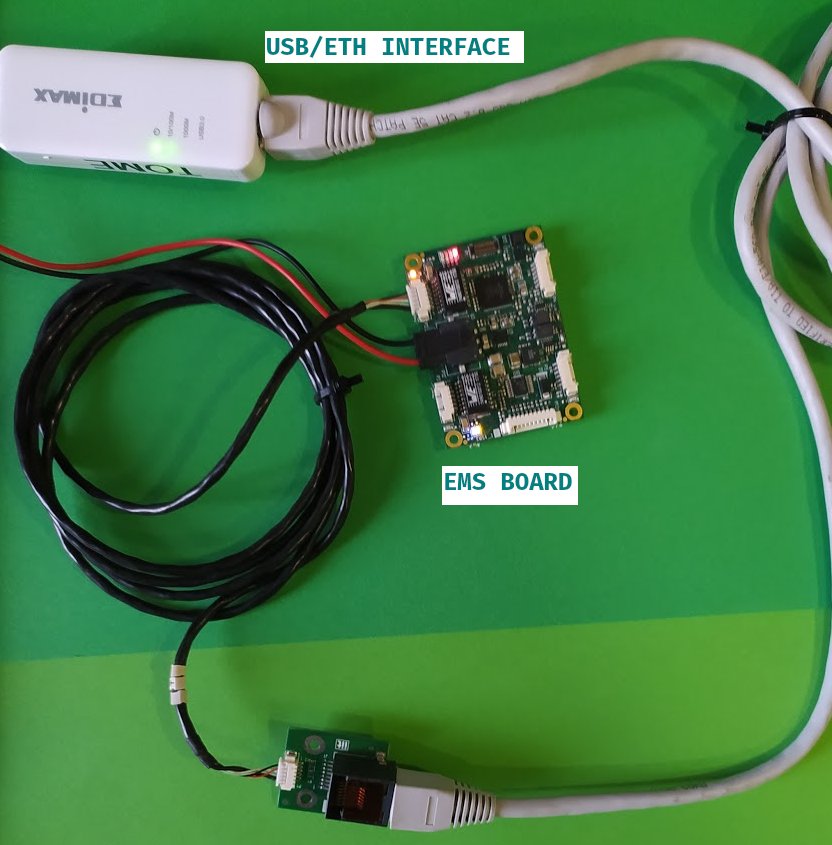
In the image above the ETH interface used is an USB/ETH adapter but a physical network interface can be used as well.
Requirements
To let the setup working we need:
- A laptop/workstation with a network interface available (both physical or an
USB/ETHadapter) - The
robotology-superbuildinstalled
Memo
Remember to enable the ROBOTOLOGY_ENABLE_ICUB_HEAD profile when compiling robotology-superbuild in order to make FirmwareUpdater available.
Ubuntu
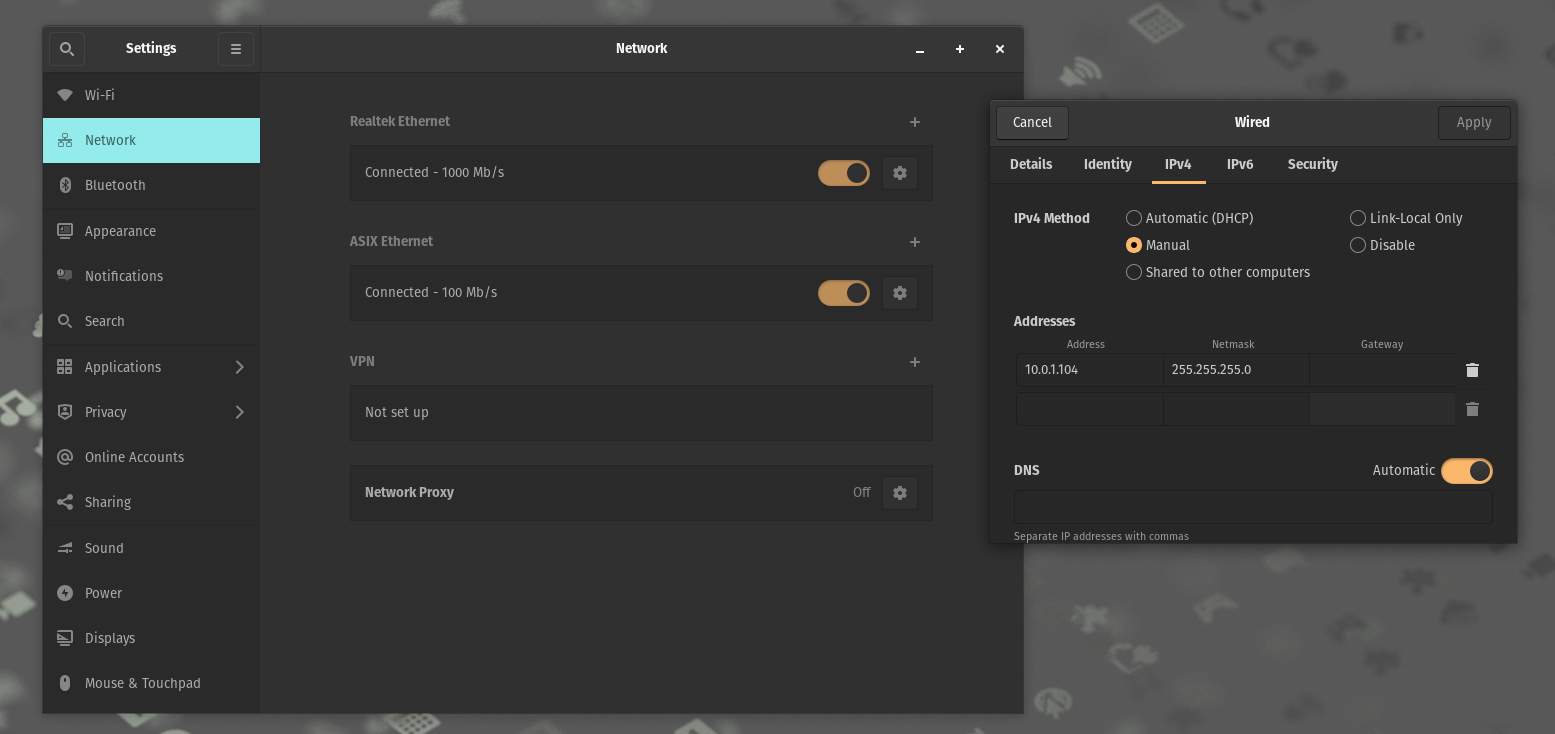
In order to communicate with an ETH board, we need to assign a static IP to the network interface used.
To do that :
- Open
Settings->Network - Open settings of the network interface to be used (in this example
AXIS Ethernet) - Go to
IPV4tab - Select
Manualin theIPV4 Method - Set
10.0.1.104and255.255.255.0in theAddressandNetmaskfileds respectively - Click on
Applyand the restart the network interface
Note
It's also possible to define the static IP address by editing the /etc/network/interfaces as follows:
    # The primary network interface
        auto eth0
        allow-hotplug eth0
        iface eth0 inet static
        address 10.0.1.104
        netmask 255.255.255.0
        network 10.0.1.0
        broadcast 10.0.1.255
Windows
In order to communicate with an ETH board, we need to assign a static IP to the network interface used.
In this example, a USB/ETH adapter is used (but a physical network interface can be used as well) to communicate with an EMS board.
Follow the steps below:
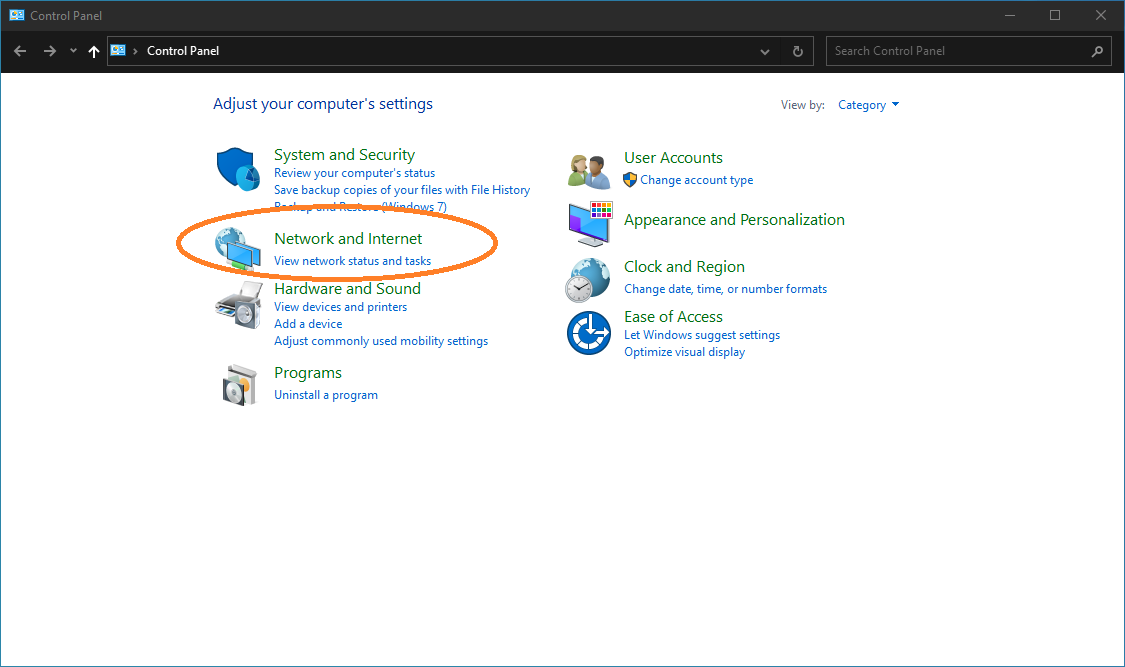
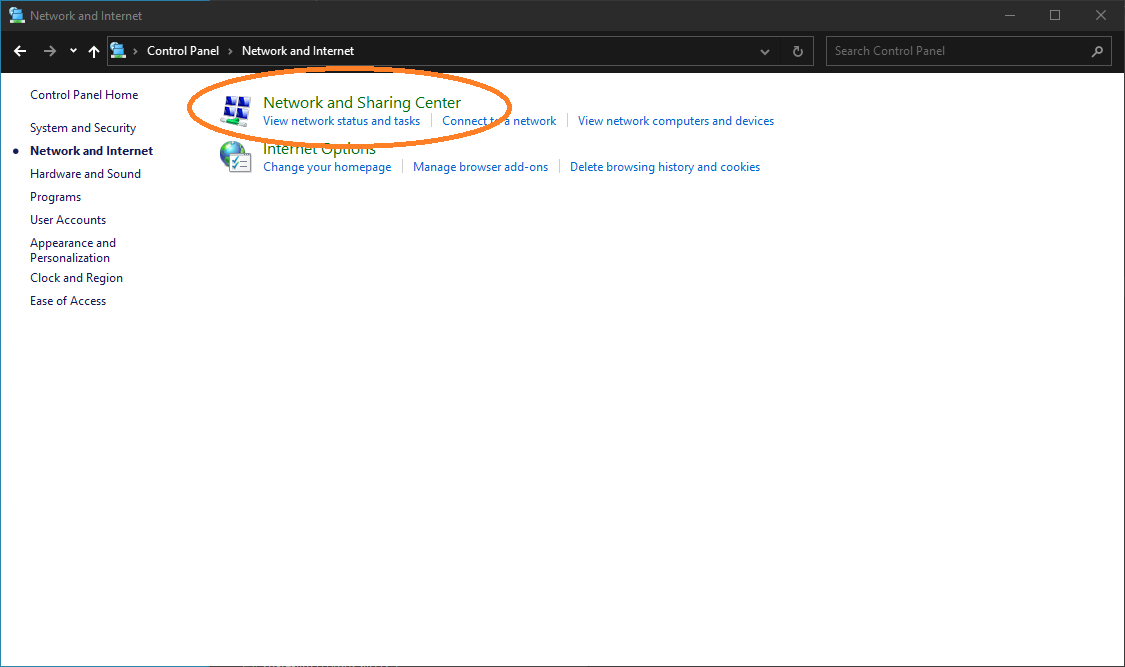
- In
Control Panelgo toNetwork and Internet
- Select
Network and Sharing Center
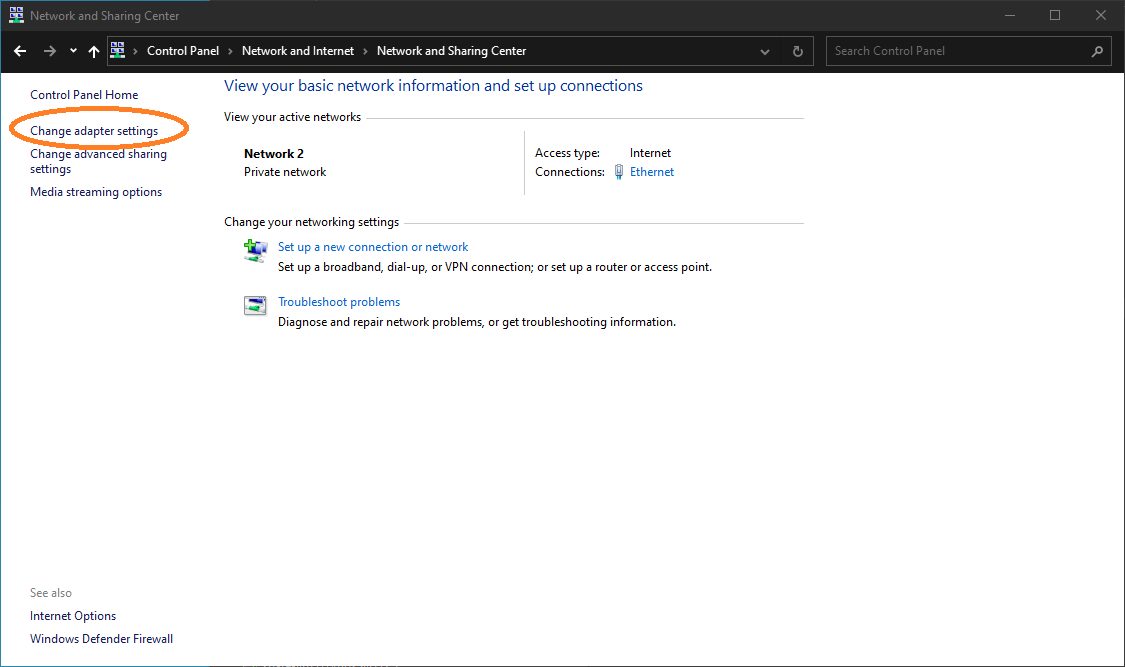
- Select
Change adapter settings
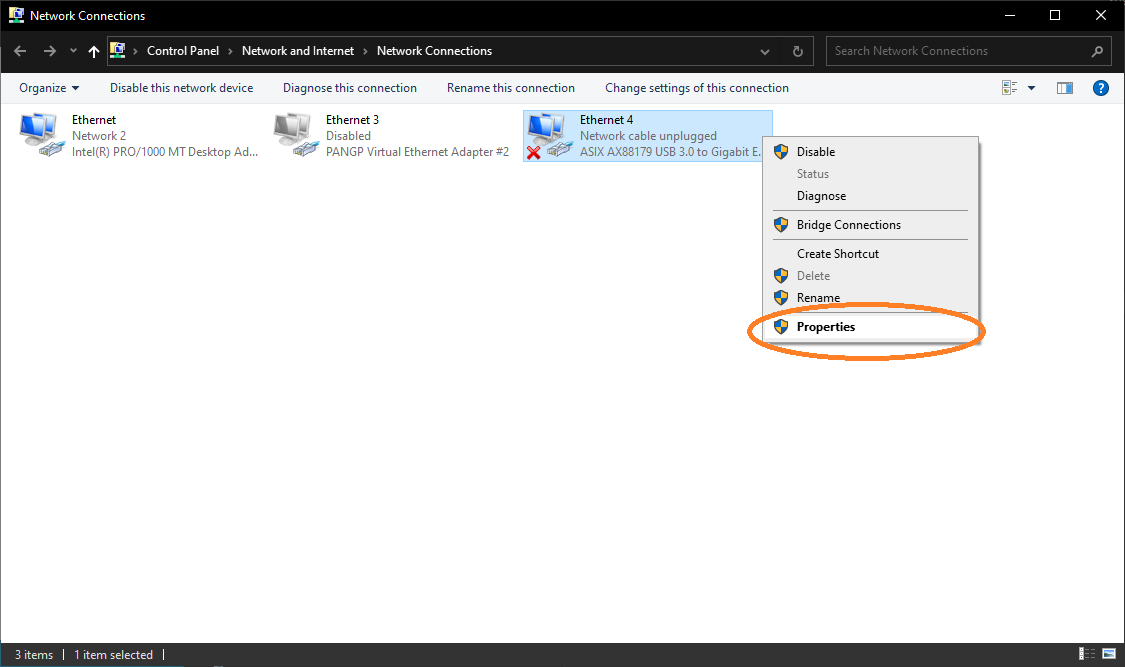
- Right click on the desired network interface then select
Properties
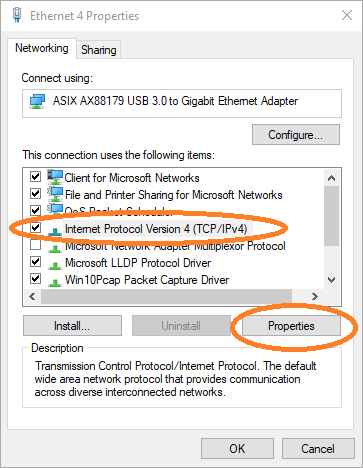
- Select
Internet Protocol Version 4 (TCP/IPv4)then click onProperties
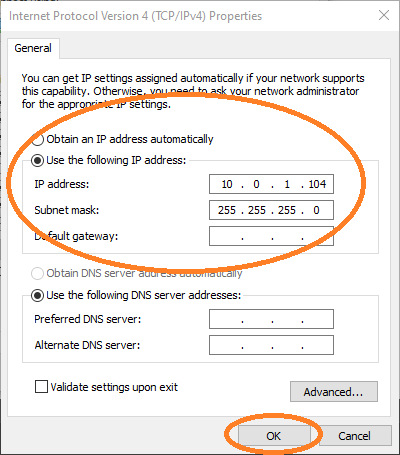
- Select
Use the following IP addressand input the values as in figure below, then clickOK
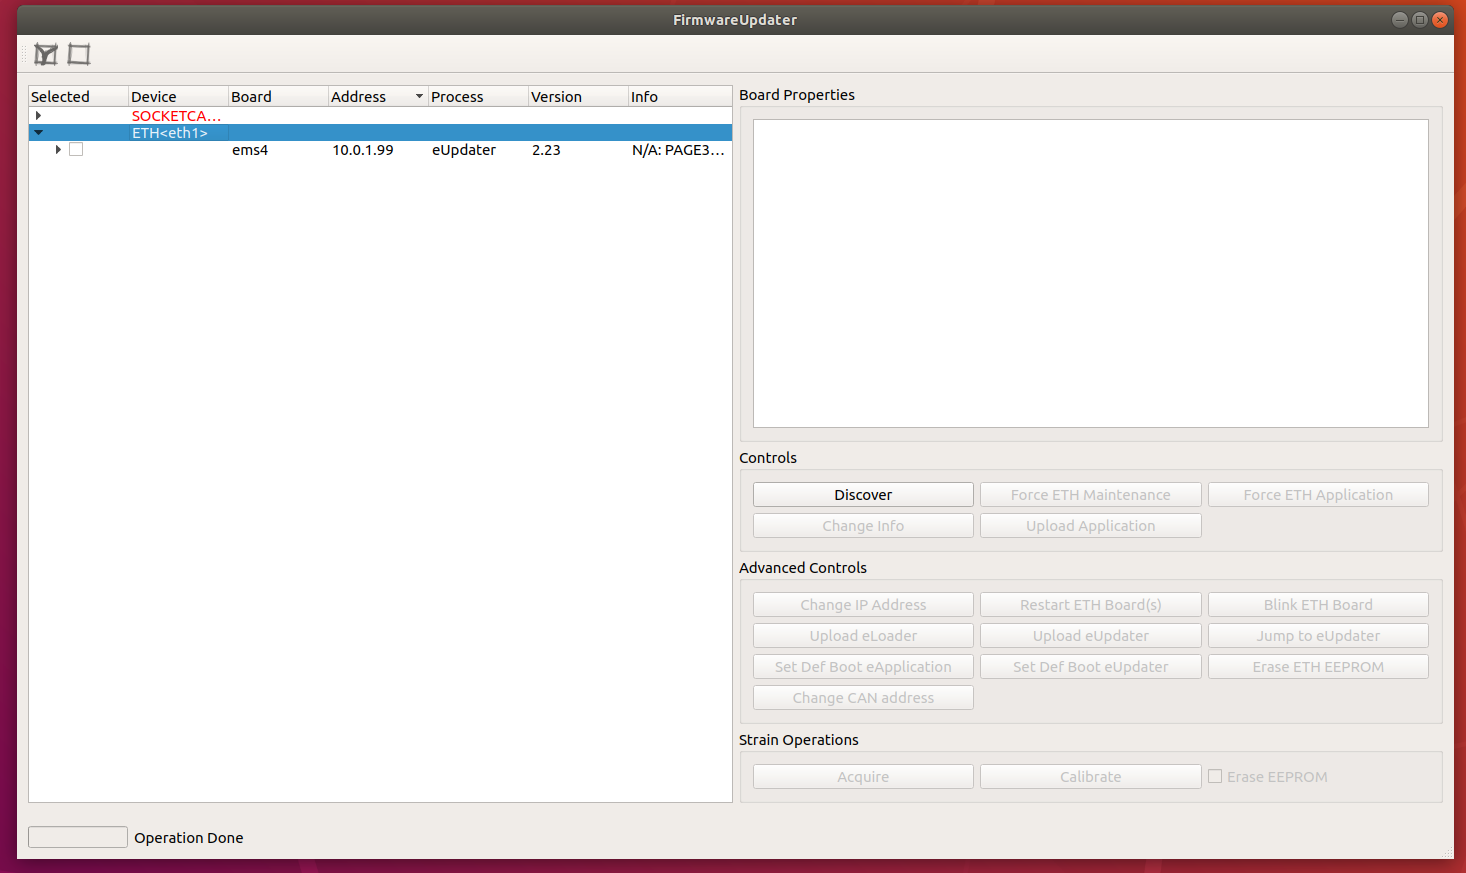
Verify the setup
In order to check if the above operations went ok:
- Power on the board
- Run
FirmwareUpdater - Select the
ETHinterface - Click on
Discover
Now you should see the board listed: