Configuring Firmware Toolchain
This page will describe the steps necessary to install the MDK-ARM Keil software for compiling the firmware, and the necessary steps to configure your firmware repository
Installing Keil
Here we will guide you through the installation of Keil. This installation requires Marco Accame to configure your license, so contact him in advance before proceeding with the installation!
Download Keil
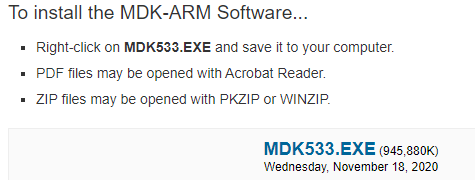
You can download Keil at the following address: Keil MDK Community. This will require a registration, after which you will be provided with the download link:

Installing Keil
Run the installer that you downloaded on the previous step.
Configuring your license
To be able to use MDK-Community, you need a valid license. Go to https://keil.arm.com/mdk-community to activate a Community (non-commercial) license.
Note
Use in commercial applications of the Community (non-commercial) license is not permitted
Configuring iCub-firmware
Now that Keil is installed and running, you need to setup the firmware and its shared repositories, which can be cloned from the follow link:
You can clone these repositories anywhere in your computer as long as they are both in the same directory. Once you clone the two repositories, you will need an extra library that is available on IITs intranet in the following path:
\\storage05.icub.iit.local\repository\software\ipal-extra
Unzip this new library file into the following path (replace ${YOUR_DIRECTORY}
with the path where you cloned the two repositories):
${YOUR_DIRECTORY}\icub-firmware\emBODY\eBcode\arch-arm\libs\highlevel\abslayer\ipal\
To properly configure this library, open Keil, go to the Project->Open Project
menu, navigate to the path above and select the ipal.uvprojx project file.
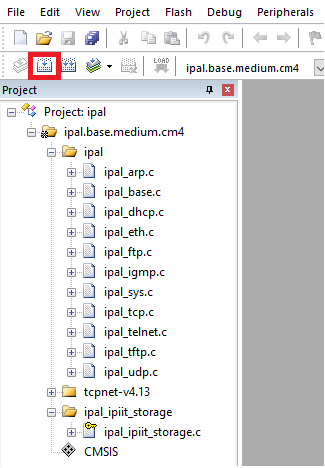
Now you should be able to visualize all the files from this project on the left
workspace of Keil:

The final step to configure the library is to press the Build button highlighted
by the red box on the image.
Testing your toolchain
Congratulations! You just built your first project using Keil!
In order to verify that everything is configured properly, you can try building the project for the mc4 board located in the following path:
${YOUR_DIRECTORY}\icub-firmware\emBODY\eBcode\arch-arm\board\mc4plus\appl\v2\proj\
Select the mc4plus.diagnostic2ready.uvprojx project, and press the Build button
just like for the ipal library. You should see on the output workspace (bottom
of Keil window) a similar output (with 0 errors):
