 iCub First Steps
iCub Unpacking and Installation
1. Open the box
In order to remove iCub from its box, first remove the black straps holding the robot.
2. Lift the robot
Carefully lift the robot and place it on the stand. The video below shows how to hold the robot for transportation.
3. Secure the robot on the stand
Pull the clip in front of the robot pelvis as shown.
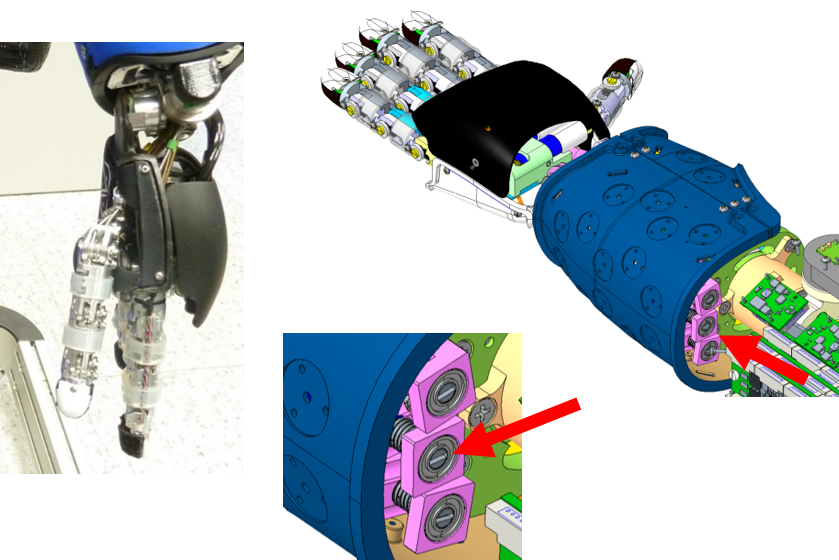
4. Remove plastic protection from arms
Pay attention to the thumbs. They should be in the position shown below. If you want to move the thumb proximal joint, manually turn the corresponding motor with a flat screwdriver.
5. Cables connection
Follow the video. The power supply is already set at the right voltage and current. The ETH cable needs to be connected to the robot laptop.
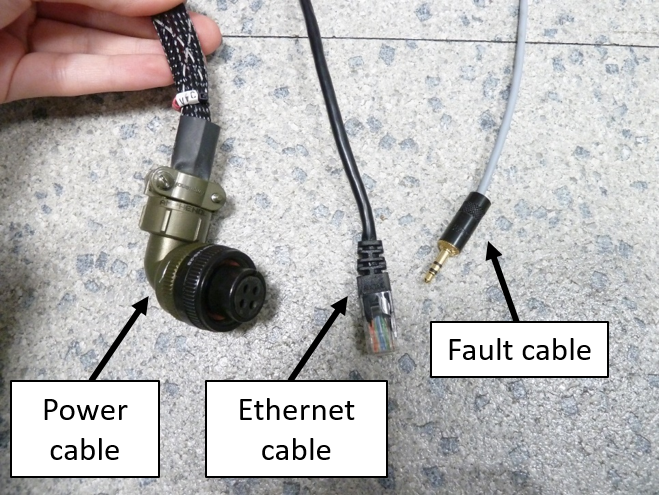
Make sure that the power connector is in place:
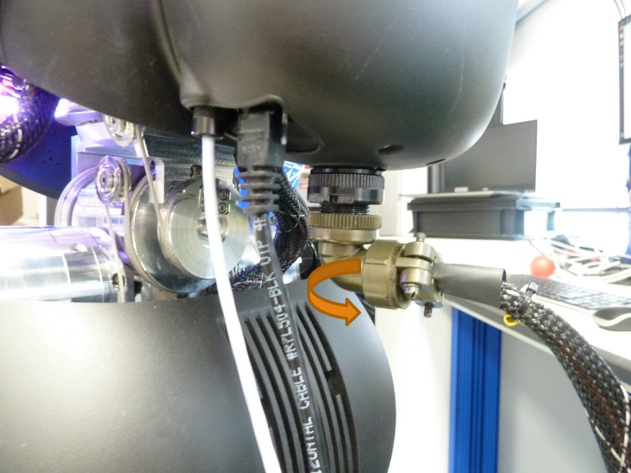
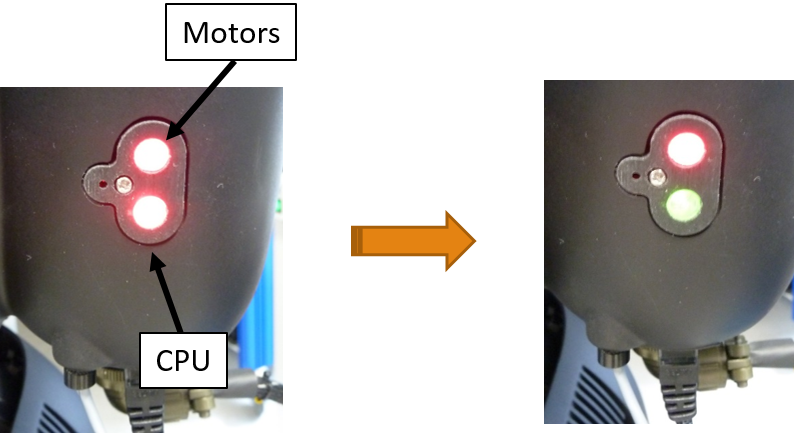
After turning on the power supply, you should see the two buttons in the backpack turning red. In order to turn on the icub-head pc press the lower button.
First Start with the iCub
Basic recommandations
Make sure you have connected the robot and the laptop server together with an ethernet cable.
Turn both CPU and motors switches from icub at the level of the backpack.
Laptop commands
Note
the password for icub user is icub as simple as that
Please open a terminal from the icon on the launch bar.
Type:
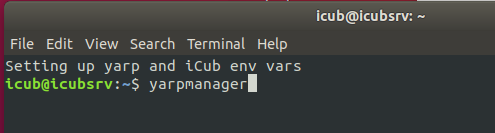
A GUI will open
-
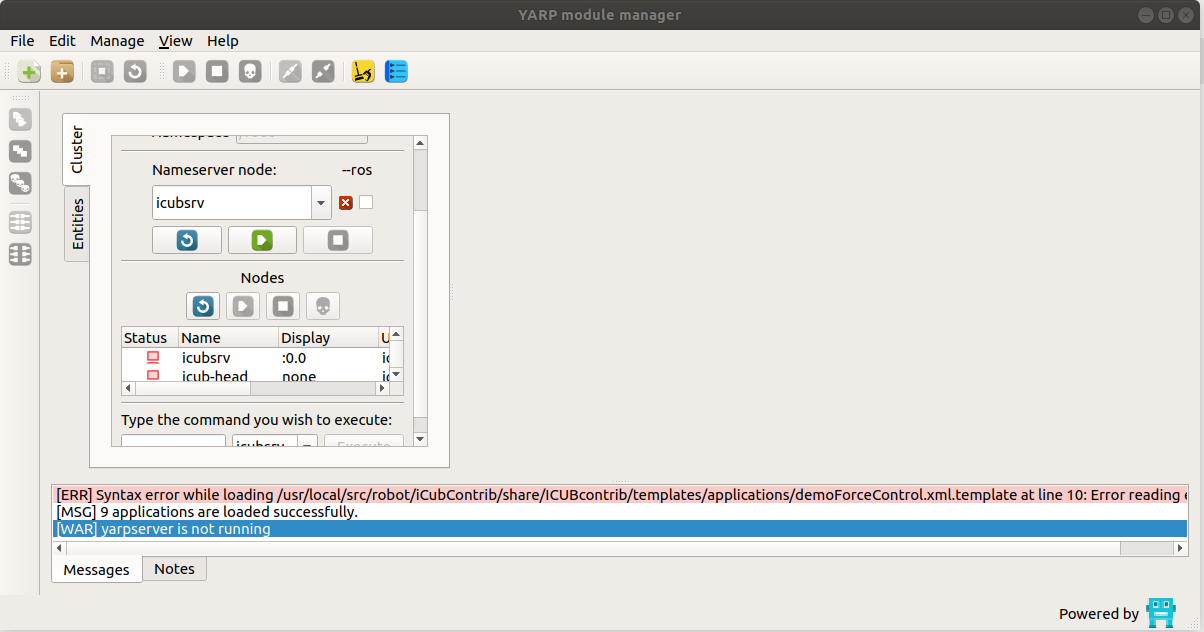
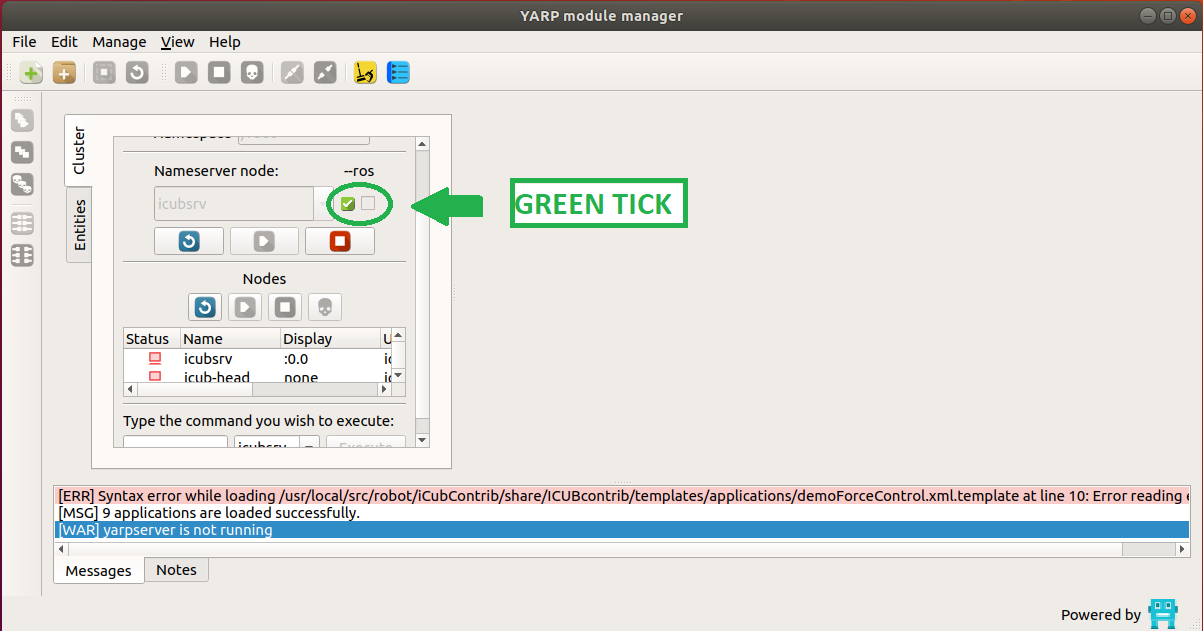
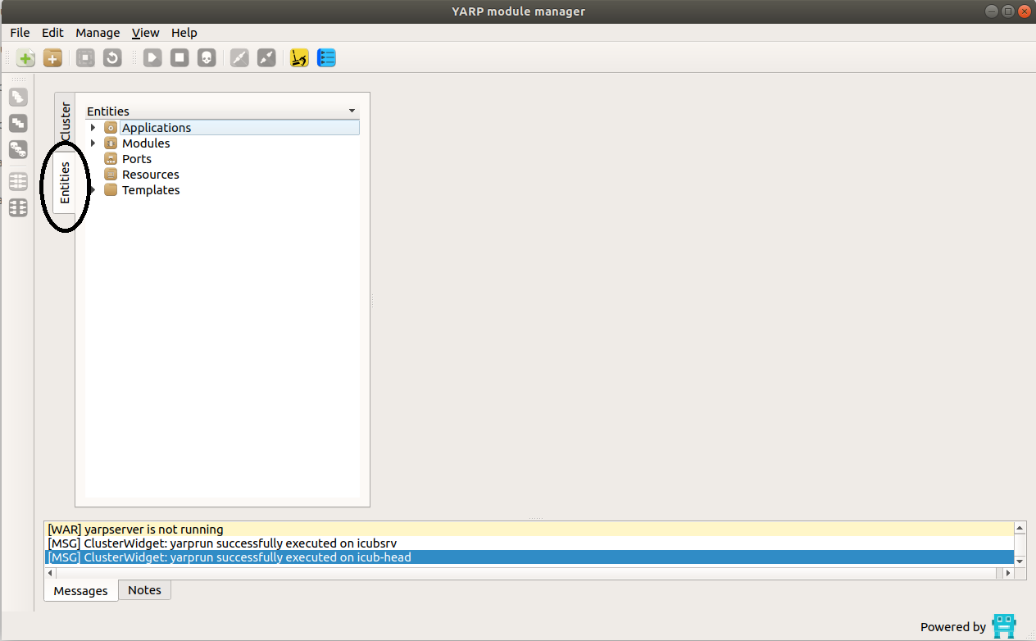
Click on Cluster tab:
-
Click on GREEN play button on Nameserver node
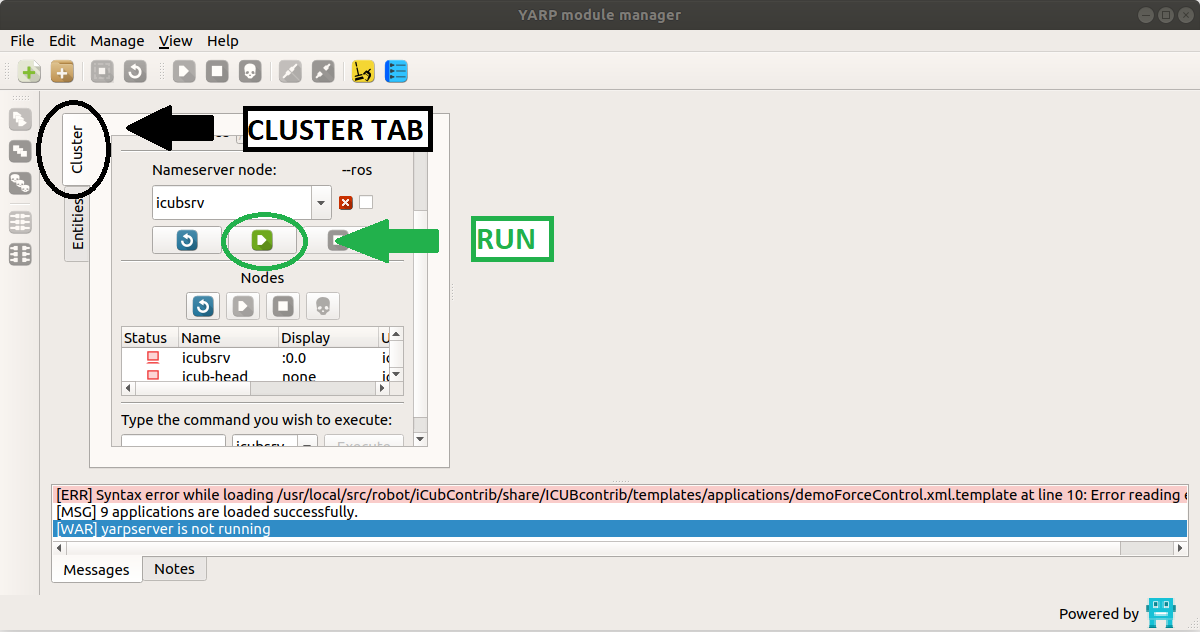
the tick icon next to icubsrv should become green
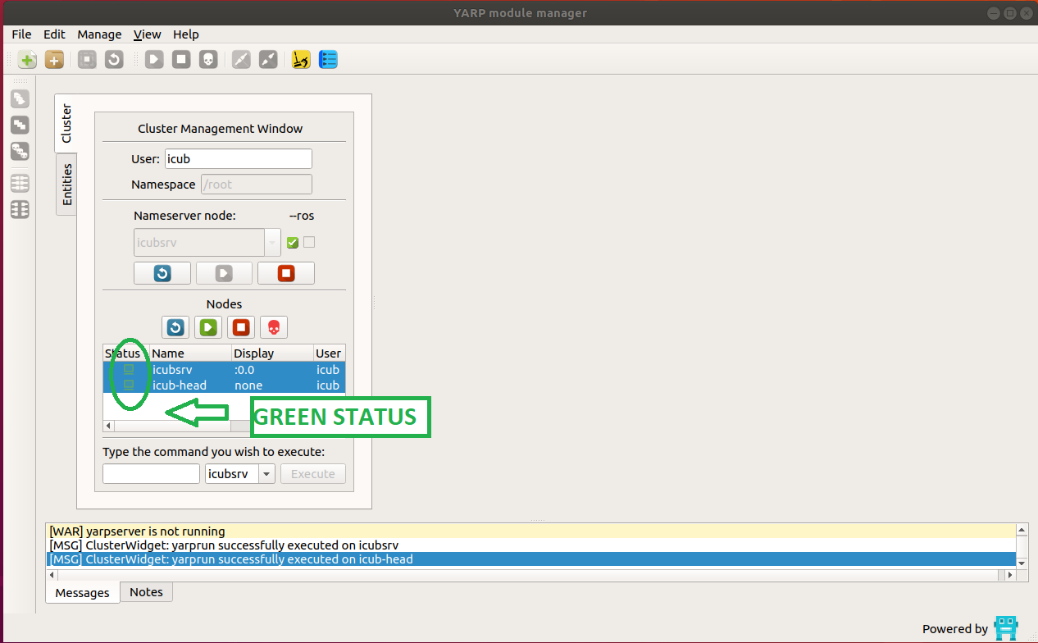
On nodes :
- please select both icubsrv and icub-head
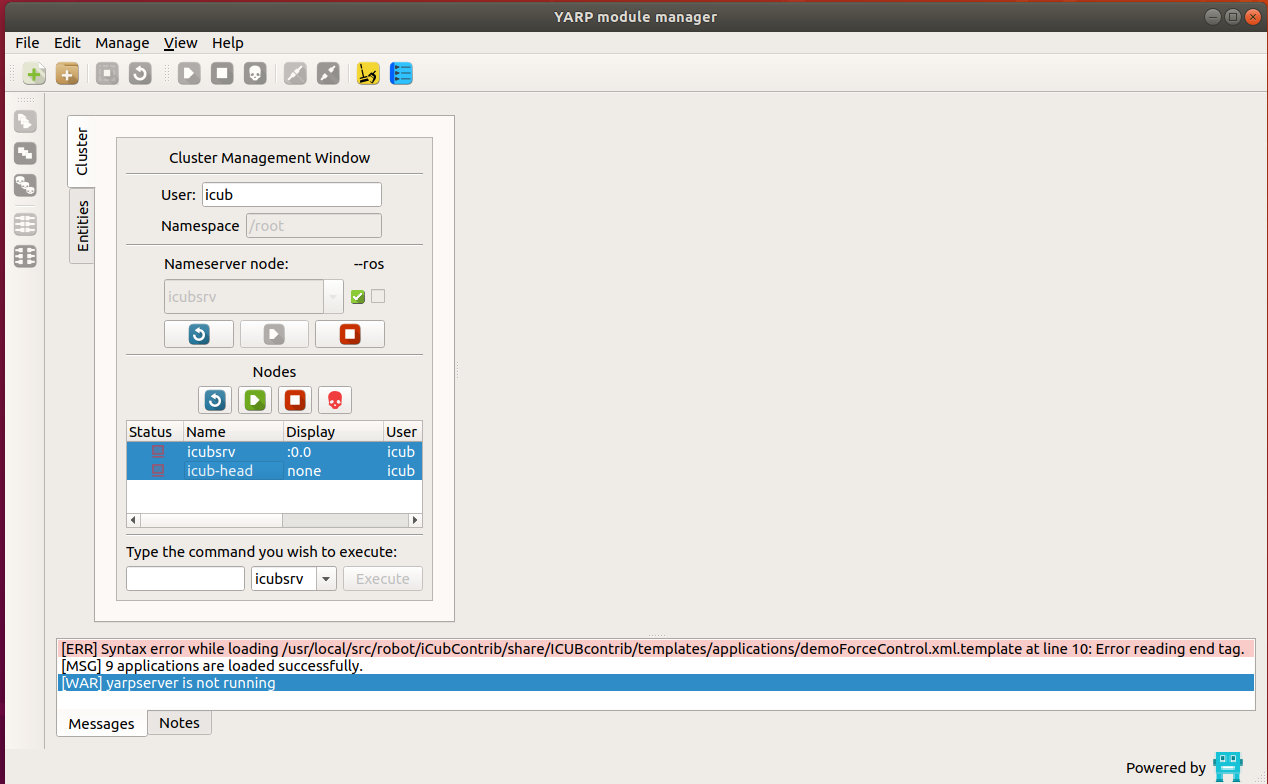
- click GREEN play button.
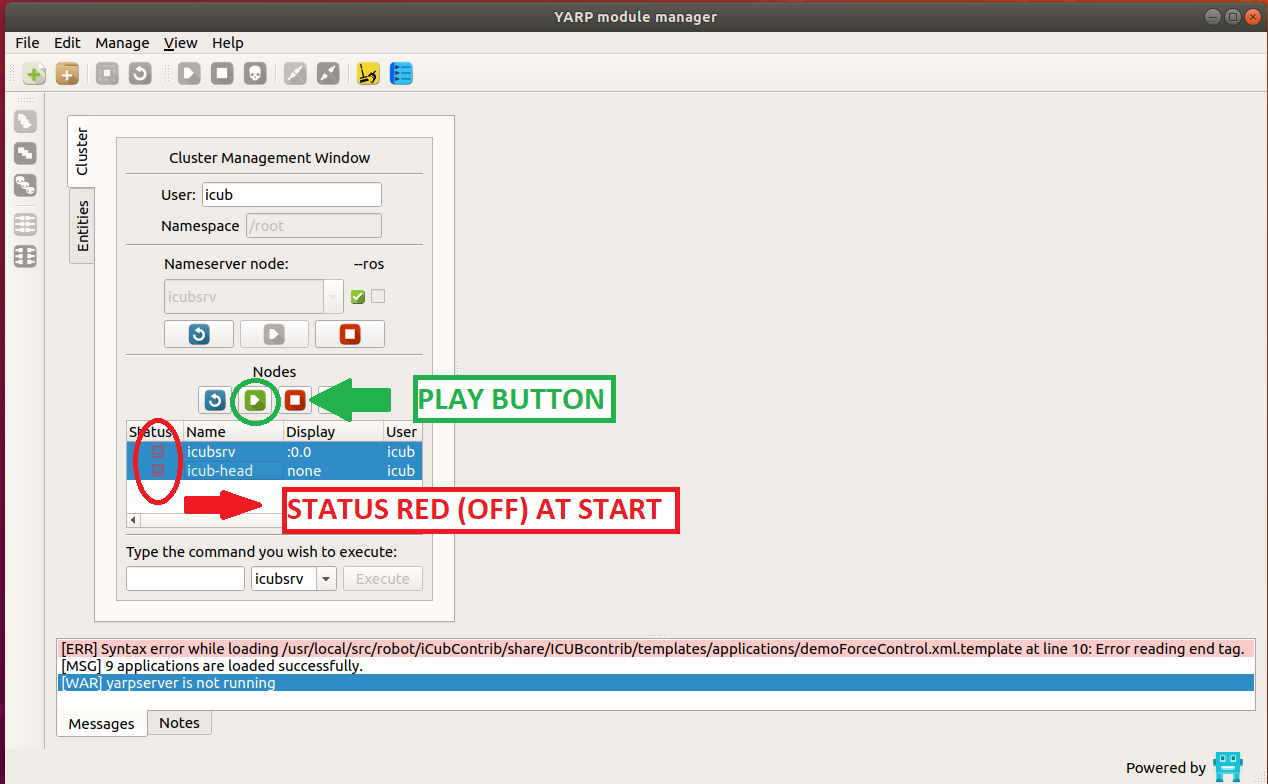
Both TV icon should turn from RED to GREEN
On Entities tab:
On Applications :
- Click on the arrow next to Applications in order to see the pre-installed apps.
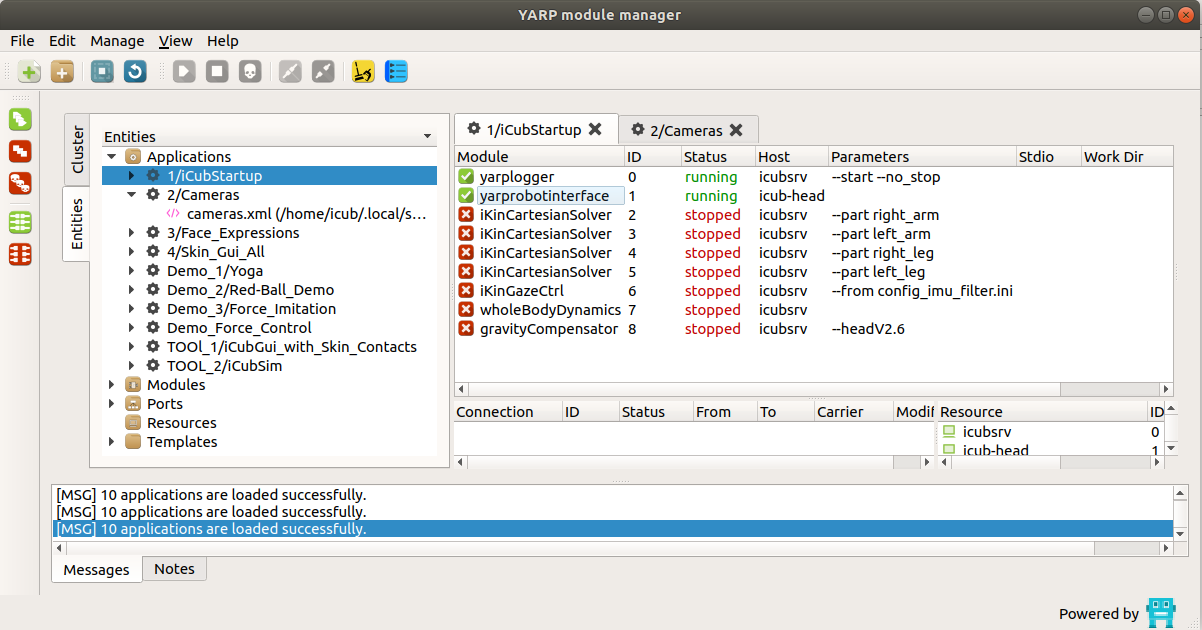
- double click on 1/iCubStartUp
- right click on yarplogger (a side option window will show) and click run.
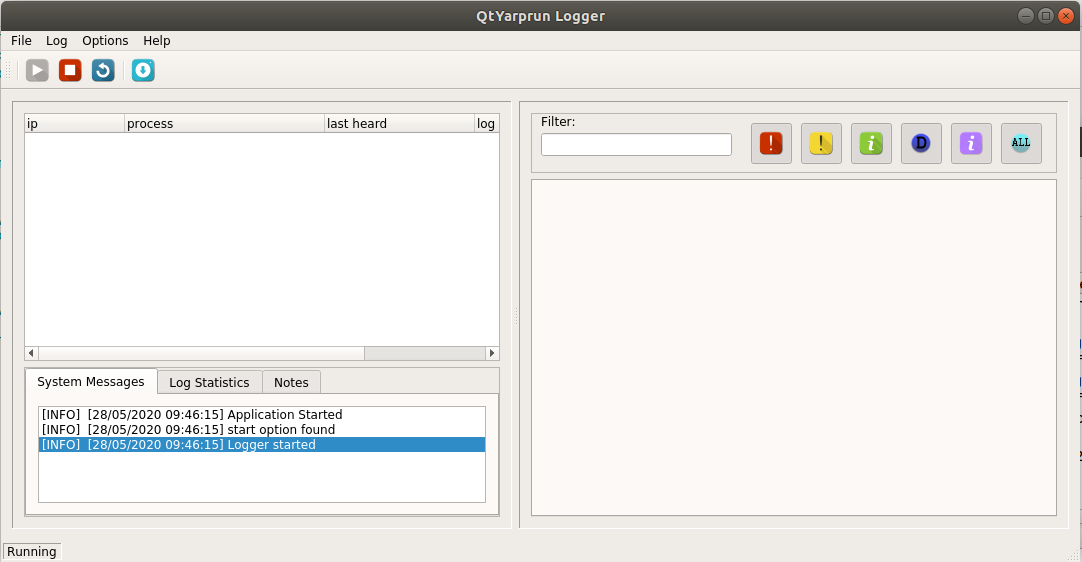
Note
This will create a new window to log messages from every applications that you will run and give us feedback – VERY USEFUL for debugging)
Robot Calibration
Now go back to yarpmanager window:
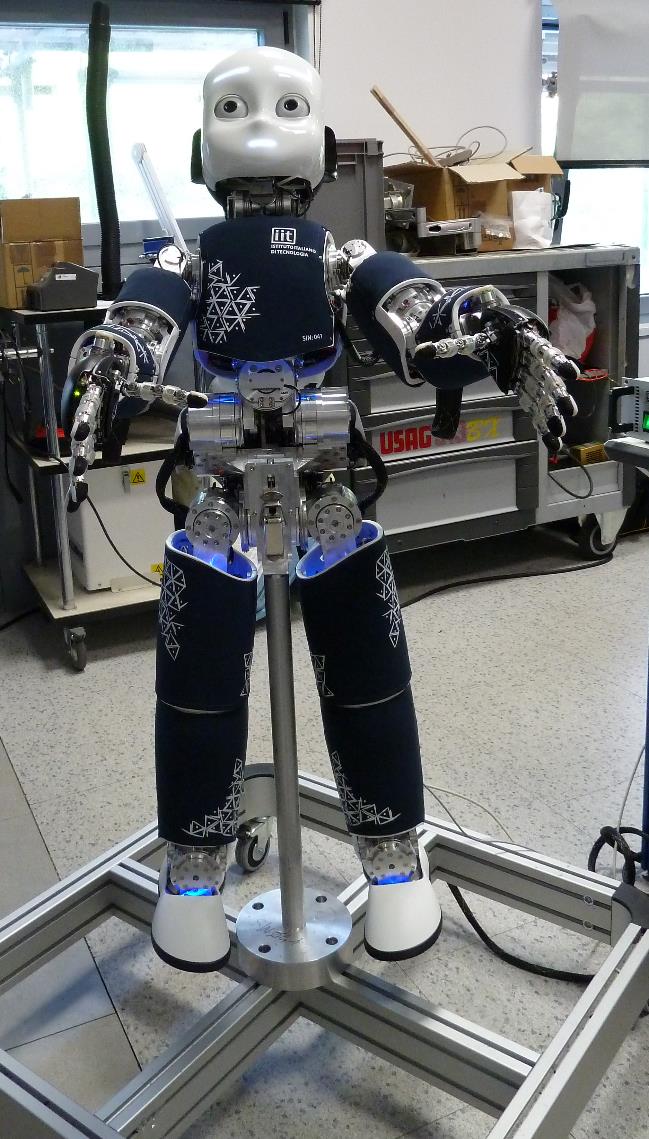
WATCH OUT
We are going to launch the robot, please make sure to have put the robot in a rest position (usual position on which the robot will be when you stop the yarprobotinterface from running) as the picture below.
You may first take a look at the videos on the Deskstop folder YOUR_ROBOT_NAME-Videos and more precisely at “1-yarprobotinterface.gif” in order to see what the robot should do at start.
When you know what you should expect to get, you may start the real robot.
Danger
Make sure the red push button is released (THIS IS THE SECURITY EMERGENCY FAULT BUTTON – IF EVER SOMETHING GOES WRONG PLEASE PUSH IT)
- right click on yarprobotinterface and click RUN
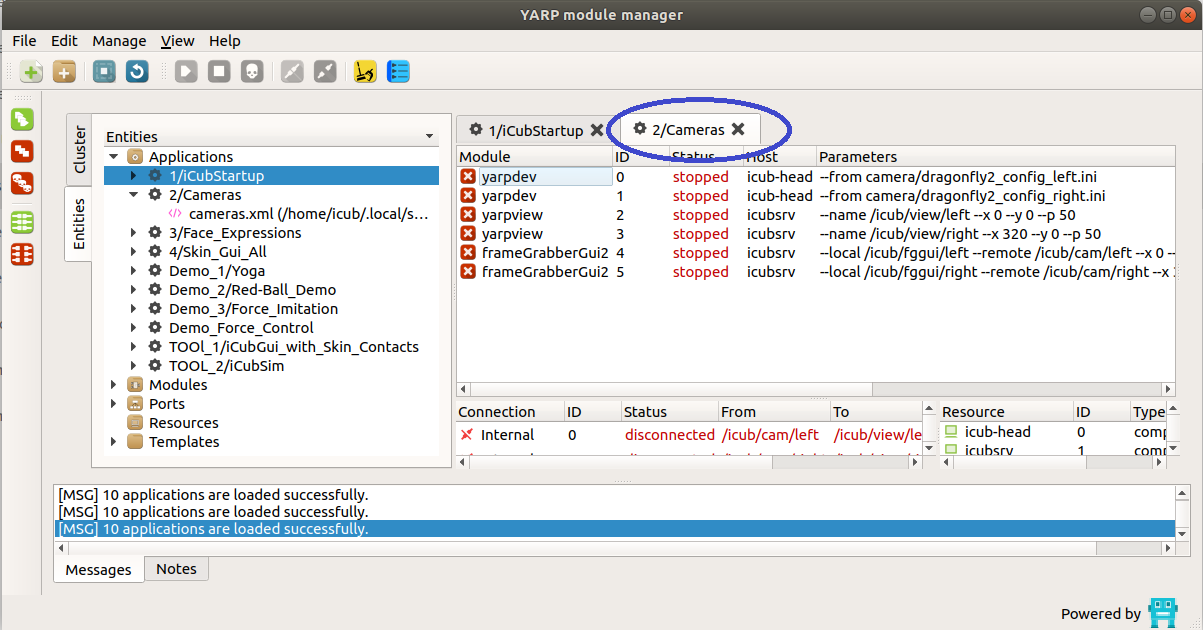
Cameras
-
double click on 2/Calib cameras:
-
Double click on cameras application to open a new tab on the right side of the yarpmanager main application window.
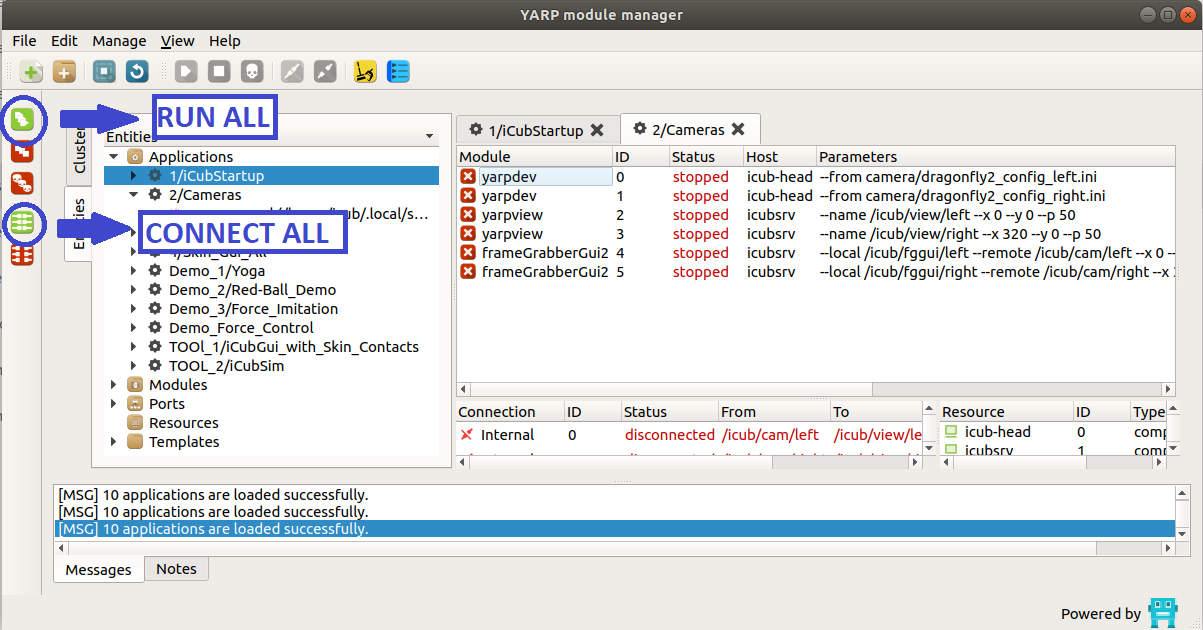
- click on the icon RUN ALL on the left side of the yarpmanager GUI
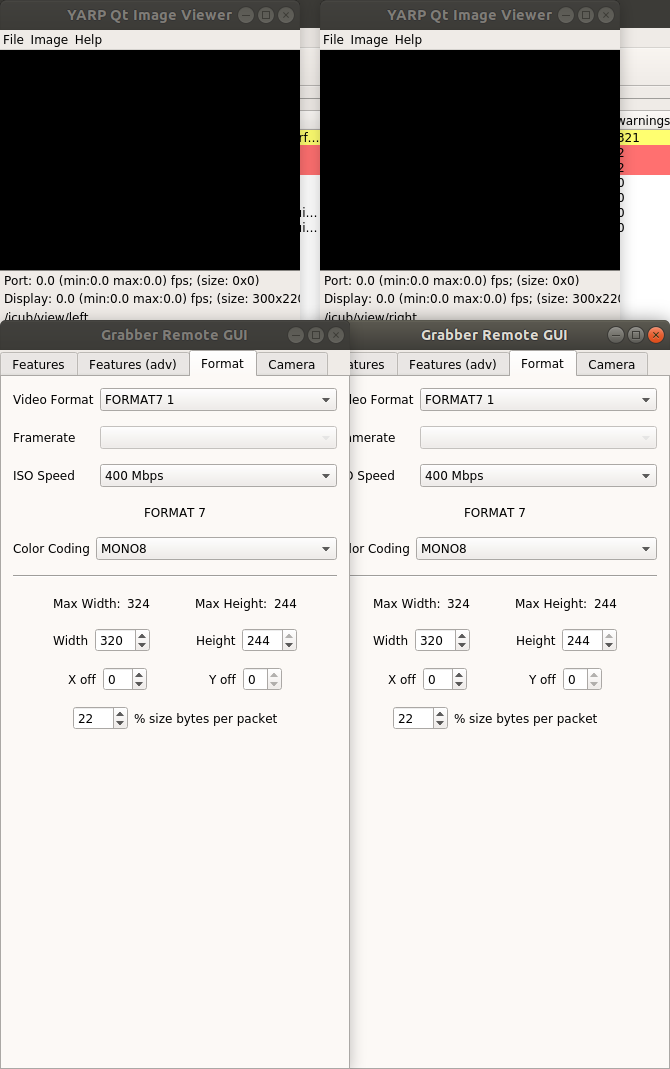
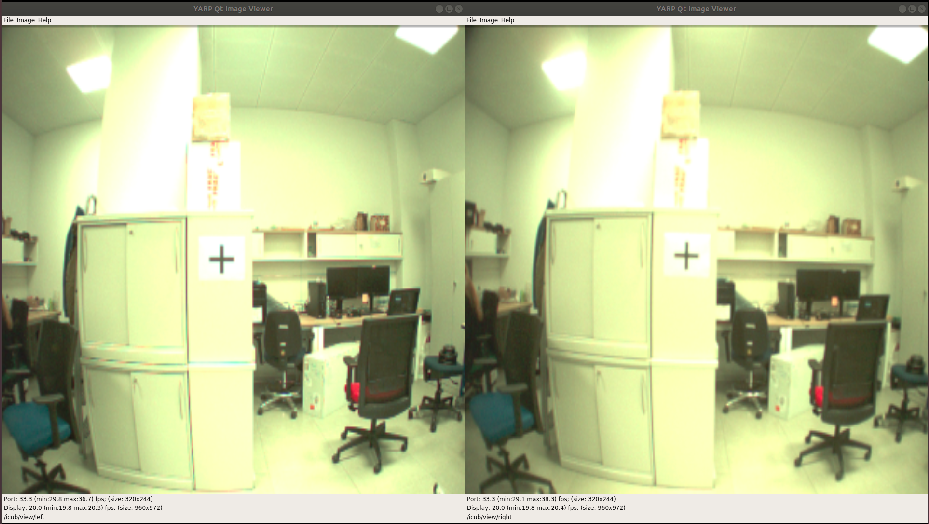
Four windows should pop-up: 2 for the cameras and 2 for settings on the cameras.
- Click on CONNECT ALL button on the left side of the GUI and at the very moment you should be able to see the images inside the two cameras windows.
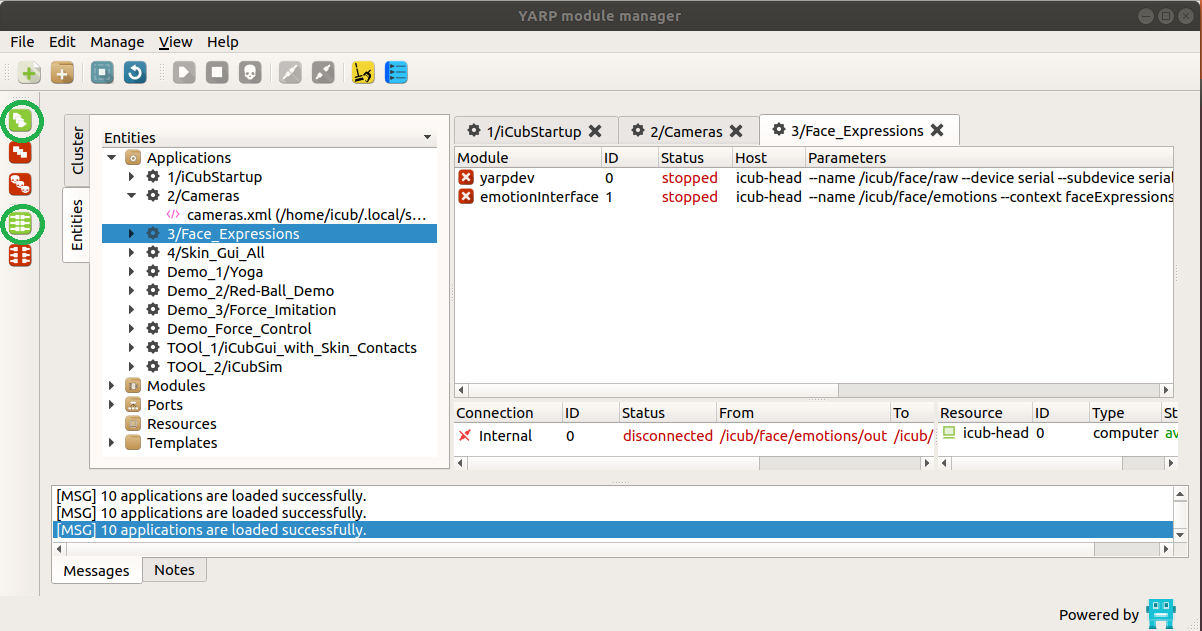
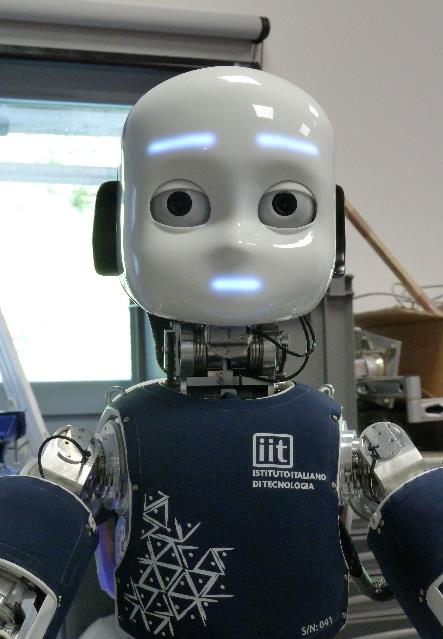
Face Expressions
- double click on 3/FACE EXPRESSIONS:
-
a new tab should appear into the main application container
-
click on RUN ALL
-
click on CONNECT ALL
The face should turn from picture 1 to picture 2 (all the connections are OK if everything goes as explained)
| before connection | after connection |
|---|---|
 |
 |
Skin
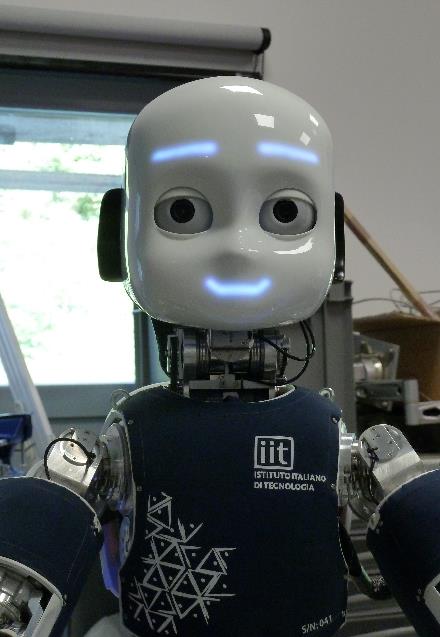
- Double click on Skin_Gui to create the new tab
- click on RUN ALL
Note
This should make pop up 14 windows (13 skin patches and one user interface) for a FULLY SENSORIZED ROBOT, if your robot is less sensorized you may see less windows
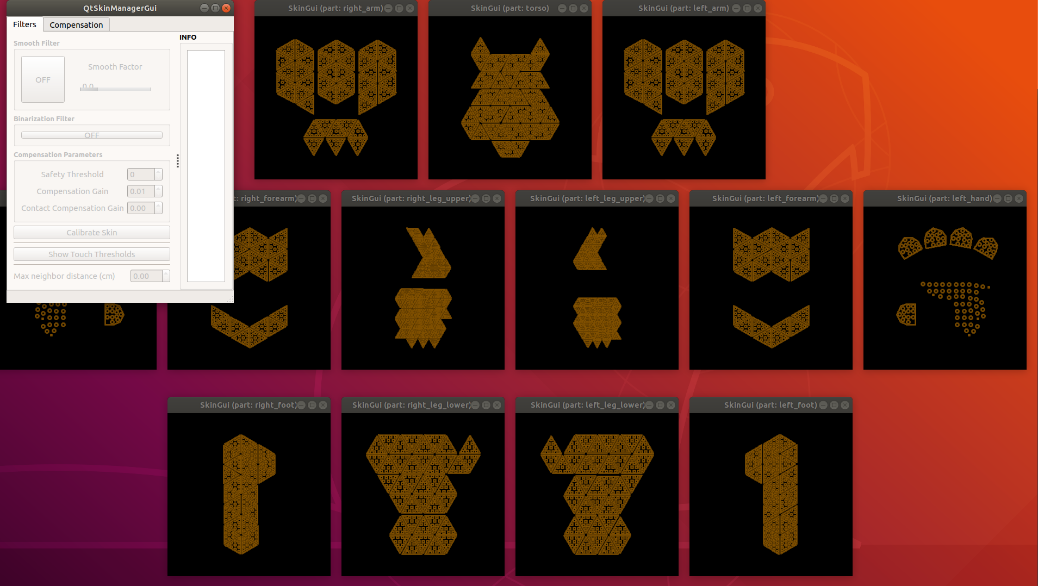
-
click on CONNECT ALL
-
click on Binarization Filter button and make it ON, on the QtSkinManagerGui
You can now start touching the robot everywhere the skin patched are present.
videos-gifs
See video test-skin.mp4 (or .gif) for the test made on your robot.
Note
Once done using the robot (to do not over use the CPU for the server side– icubsrv – please close the applications – by clicking on DISCONNECT ALL and STOP ALL for the applications skin)
iCub Basic Demos
Demo Yoga
- double click on Demo Yoga – it creates a new tab.
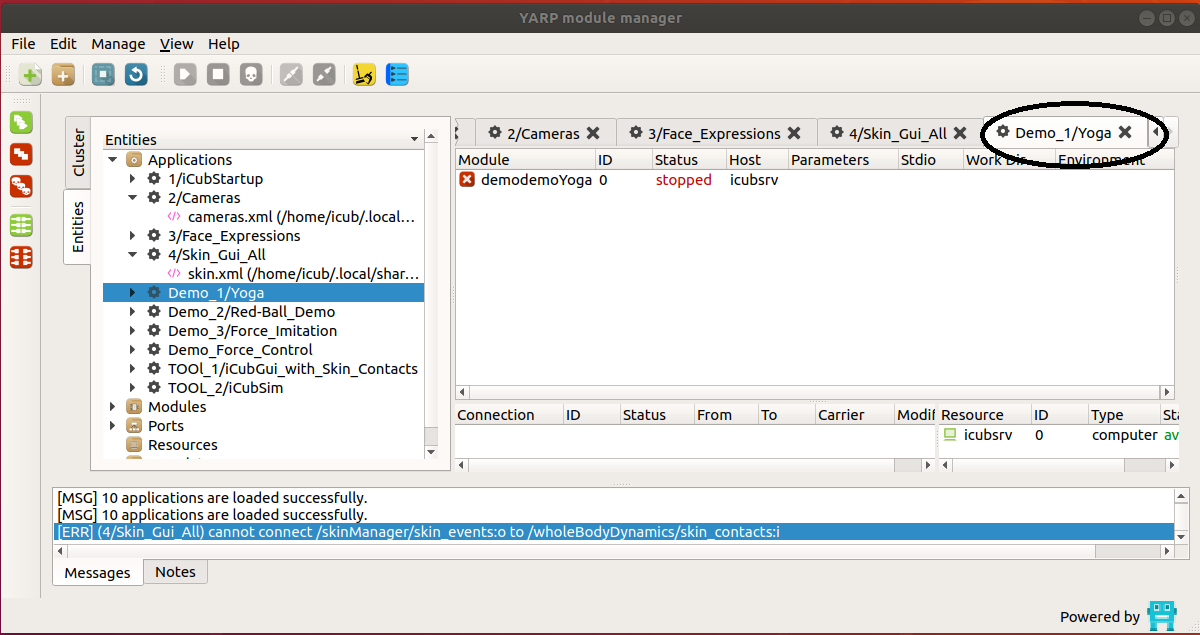
Note
Make sure that the robot as some enough room to move before launching it – TAKE A LOOK AT the video 4-Yoga.mp4 (or .gif) to see what the robot should do
- Click on RUN
When finished STOP the application.
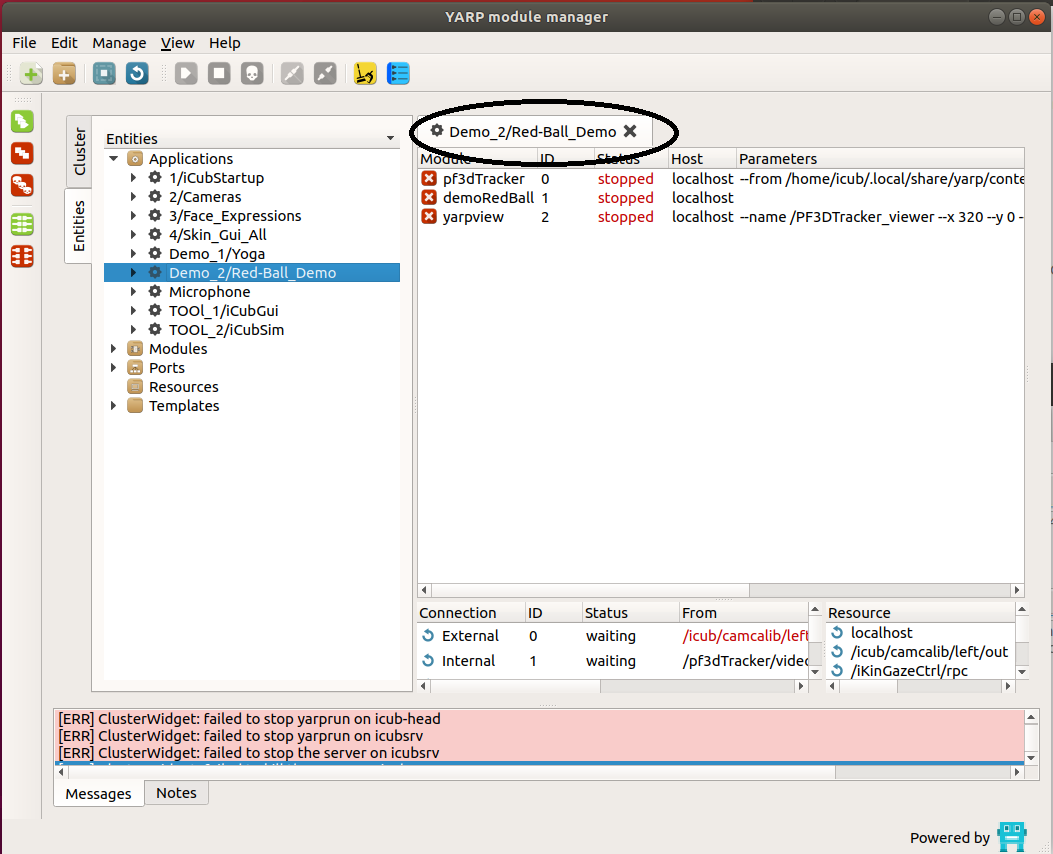
Demo RedBall
(You may try to fetch a spongy red ball of diameter 6cm)
- double click on Red Ball Demo – a new tab should be created.
First, you will need to launch and prepare the robot. Go back to the tab 1/iCubStartUp.
- RUN only the two iKinCartesian (for both arms) and iKinGazeCtrl.
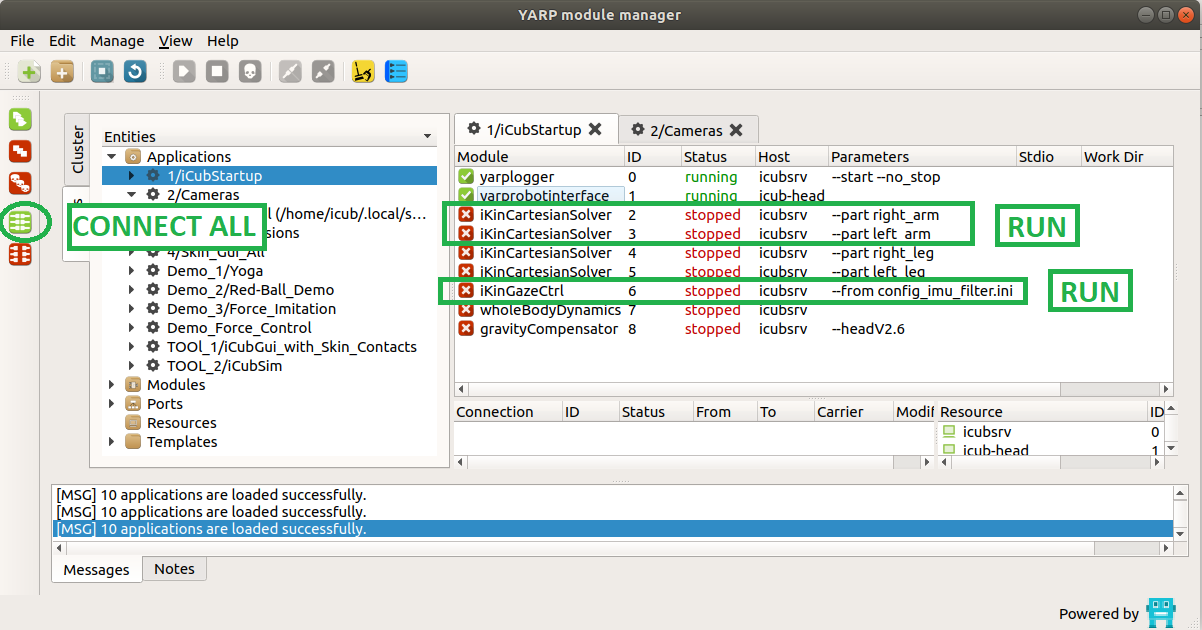
When the icons next to those three modules turn to green
-
Click CONNECT ALL then:
-
RUN both wholeBodyDynamics and gravityCompensator modules
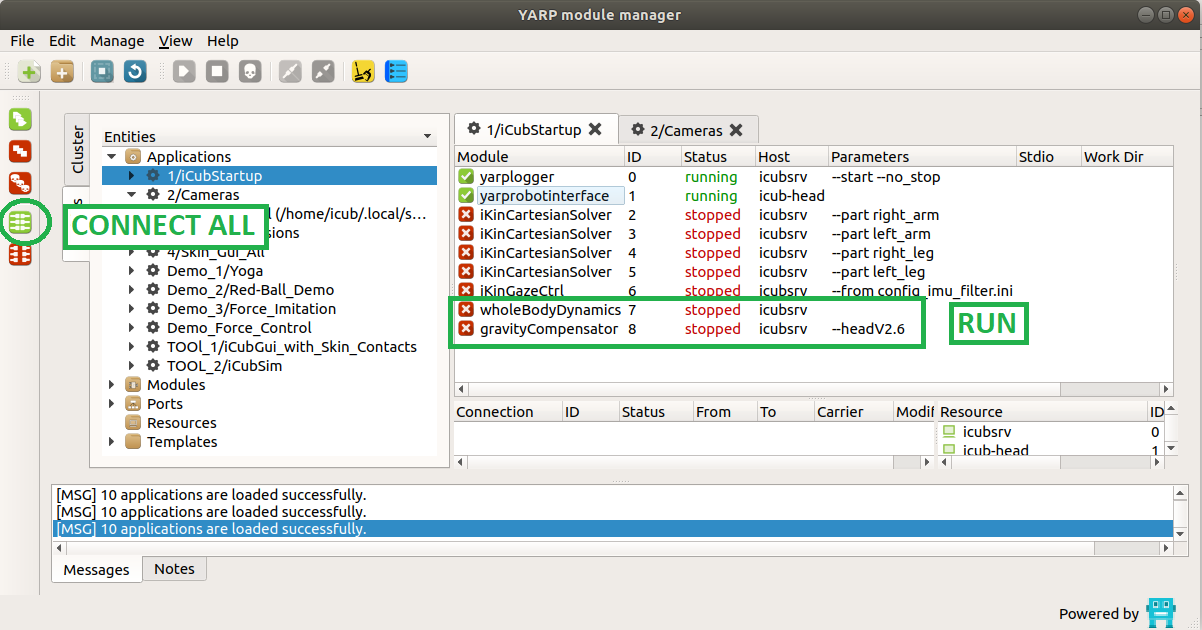
when they turn to green
- Click on CONNECT ALL
Return to the Demo Red Ball tab
- RUN both pf3dTracker and yarpview modules
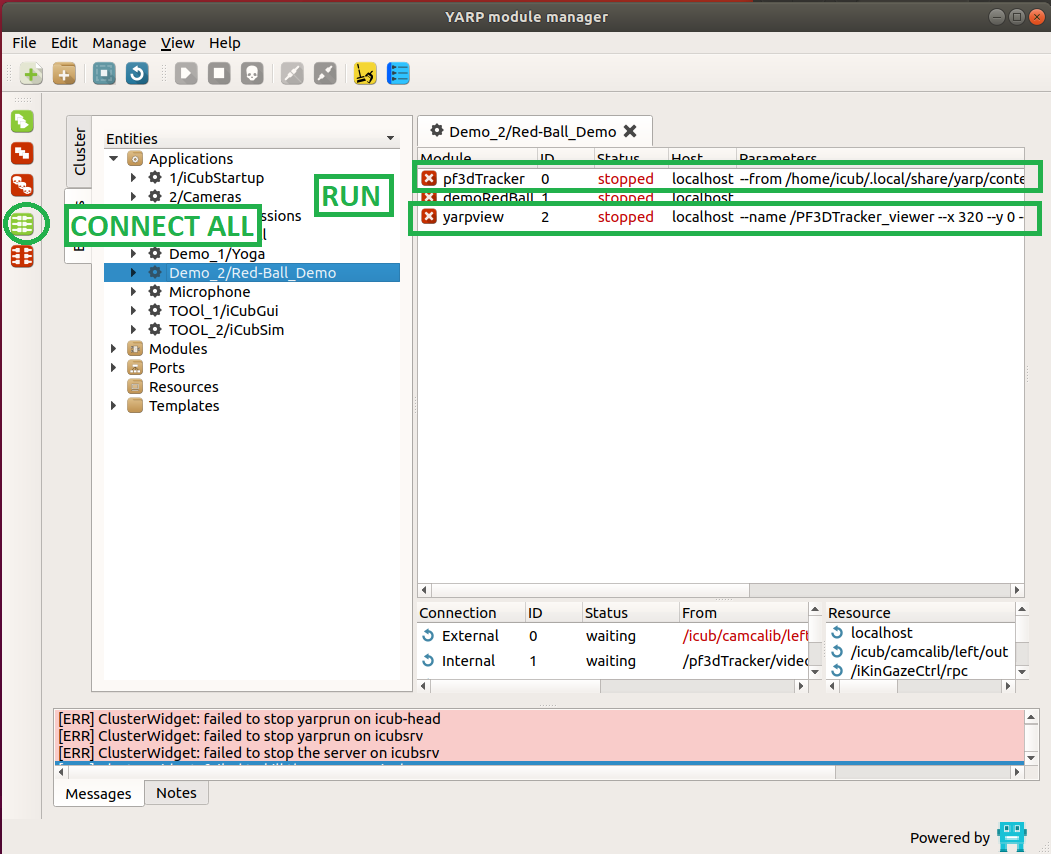
When the icons turn to GREEN (a new window should pop-up)
- Click on CONNECT ALL
Note
the new yarpview window should get connected – and inside the window you should see a yellow circle moving frenetically – the software is looking for a round shape)
-
Search for the window Grabber Remote GUI for the left camera.
-
Go to the tab Feature:
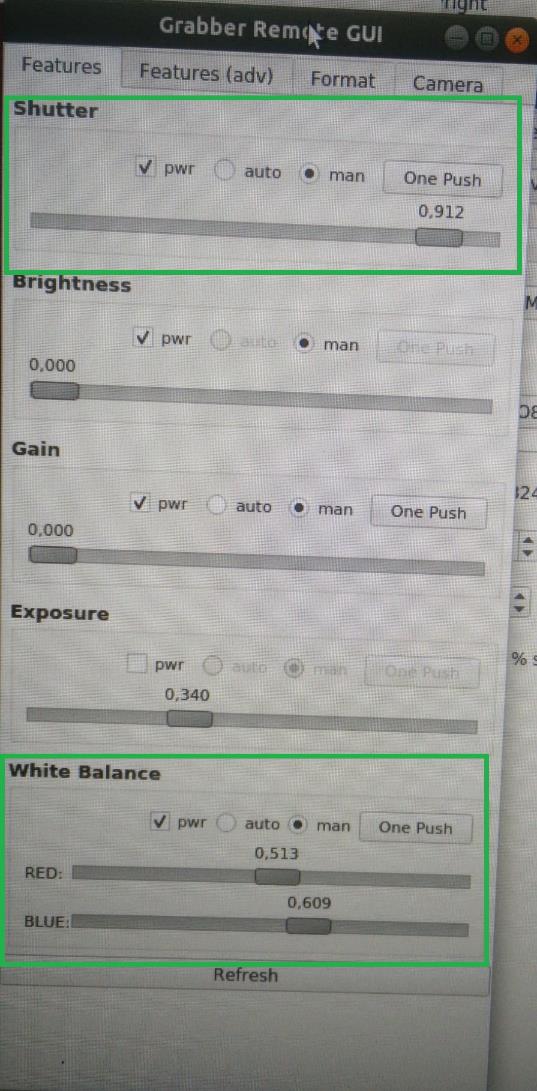
- Move the "Shutter" slider to middle range until the glowing of refracted light on the left image got almost restrained.
- Move "GAIN" slider to ZERO
- Move a tiny bit the BLUE and RED sliders inside the “White Balance” option to get to an almost normal color. (set the one in the picture above)
Go to the Features (adv) tab:
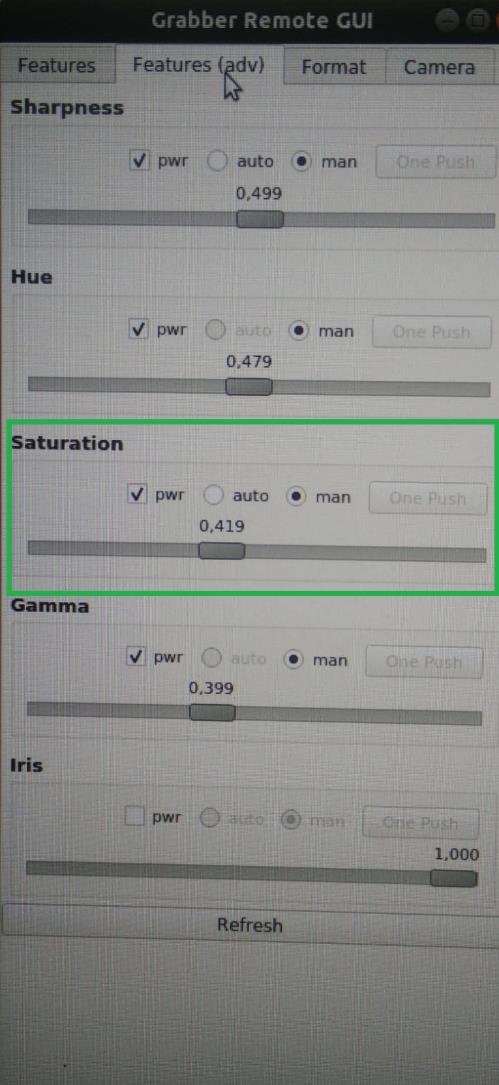
- Put the red ball in front of the robot (the ball should be visible on the left camera viewer).
Increase the SATURATION slider until the red ball gets recognized (circle turns from RED to GREEN) inside the pf3dtracker viewer.
When done this process the robot will be able to see the ball and you can launch finally the demo.
- RUN demoRedBall
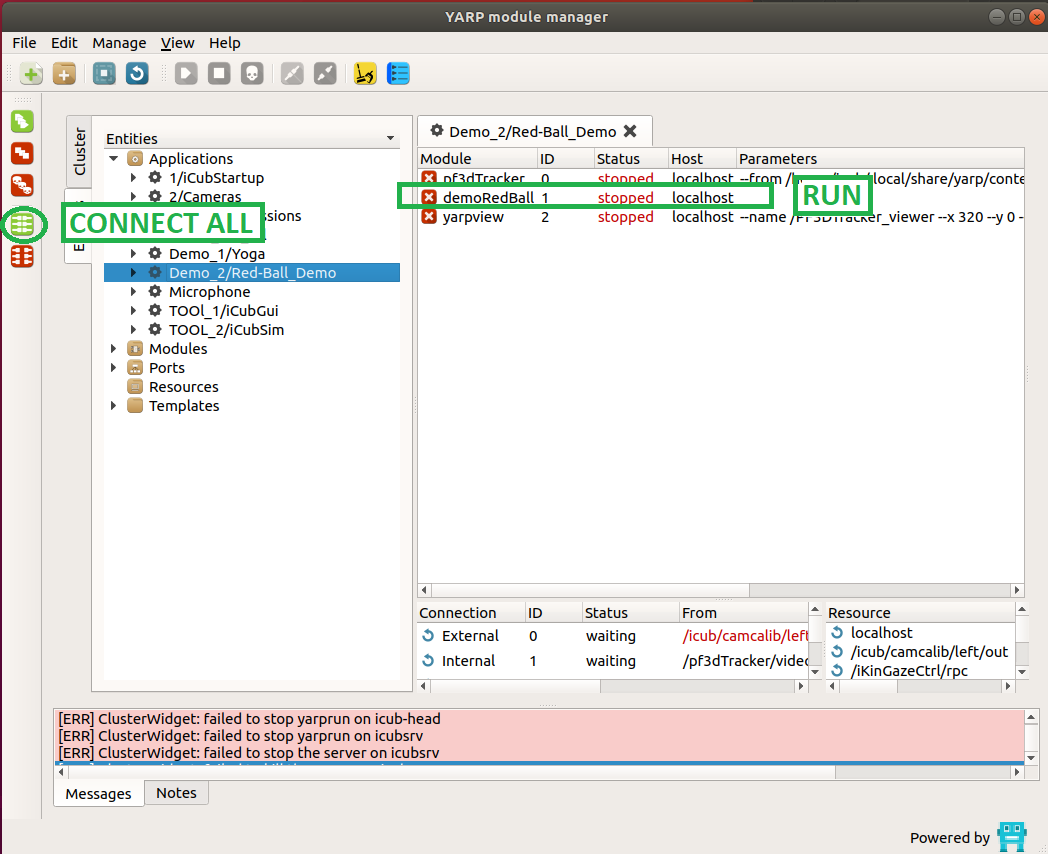
- click on CONNECT ALL
Warning
BEWARE DO NOT PUT THE BALL TOO CLOSE FROM THE BODY/FACE!!!!!
Warning
THE ROBOT IS NOW MOVING TOWARD THE BALL AND TRY TO GRASP IT
See the video tutorial on how to let the robot grasp the ball